Category: Instructions

sourdough starter instructions printable

Welcome to your ultimate guide for creating and maintaining a sourdough starter! This printable resource offers easy-to-follow instructions, ensuring your starter thrives. Perfect for beginners, it covers everything from initial creation to long-term care, helping you bake delicious sourdough bread with confidence and consistency.

What is a Sourdough Starter?

A sourdough starter is a natural mixture of wild yeast and lactic acid bacteria that ferments sugars, producing carbon dioxide gas. This process creates the rise in bread without commercial yeast. It’s made by allowing flour and water to sit, fostering the growth of these microorganisms. Over time, with regular feeding, the starter becomes bubbly, frothy, and active, indicating it’s ready for baking. Unlike store-bought yeast, a sourdough starter is alive and requires care. It’s a key ingredient in sourdough bread, giving it a tangy flavor and chewy texture. Many bakers find the process of creating and maintaining a starter rewarding, as it connects them to traditional bread-making methods. A healthy starter is essential for achieving the desired results in sourdough recipes, making it a cornerstone of artisanal baking.

Benefits of Using a Sourdough Starter

Using a sourdough starter offers numerous benefits for bakers. It eliminates the need for commercial yeast, allowing for a more natural fermentation process. This results in bread with a unique, tangy flavor and a chewy texture that many find irresistible. The starter also enhances digestion by breaking down gluten, making sourdough bread a better option for some with sensitivities. Additionally, it’s cost-effective and sustainable, as you can maintain and reuse the starter indefinitely with proper care. The process of creating and feeding a starter fosters a connection to traditional baking methods, making it a rewarding hobby. Many bakers appreciate the versatility of sourdough starters, as they can be used in various recipes beyond bread, such as pancakes, cookies, and more. Overall, a sourdough starter is a valuable tool for anyone looking to explore artisanal baking and create delicious, homemade treats with ease.

Why Create a Printable Guide?

Creating a printable guide for your sourdough starter is an excellent way to stay organized and ensure consistency in your baking journey. A physical guide allows you to easily reference instructions without distractions, making the process more enjoyable. It serves as a valuable resource for beginners, providing step-by-step directions for creating and maintaining a starter. Printable guides also help track feeding schedules and storage tips, reducing the risk of neglecting your starter. Many bakers find it helpful to display these guides in the kitchen, keeping essential information at their fingertips. Additionally, printable guides can be shared with friends or used as a teaching tool for workshops. They offer a practical and accessible way to master sourdough baking, ensuring that your starter remains healthy and active for years to come. By having a guide, you can easily follow proven methods and achieve successful results every time you bake.

Creating Your Sourdough Starter

Creating a sourdough starter is an easy, rewarding process that requires just flour and water. With a printable guide, you can follow simple steps to cultivate your starter, ensuring it becomes active and healthy for baking.

Ingredients Needed for the Starter

To create a sourdough starter, you’ll need just two basic ingredients: flour and water; Use 4 ounces (by weight) of flour and 4 ounces of water for the initial mixture. Choose an unbleached, all-purpose flour or bread flour for best results. Avoid using whole wheat flour initially, as it can make the process slower. Use filtered or bottled water, as chlorinated water may inhibit microbial growth. Optional additions like a pinch of sugar or honey can help kickstart fermentation. Always use room-temperature water and store the mixture in a clean, non-metallic container. For consistency, use a digital scale to measure ingredients accurately. This simple combination of flour and water creates the perfect environment for wild yeast and bacteria to thrive, forming the foundation of your sourdough starter.

Step-by-Step Instructions for Creating the Starter

Creating a sourdough starter is a straightforward process that requires patience and consistency. Begin by combining 4 ounces of flour and 4 ounces of water in a clean, non-metallic container. Mix until smooth, then cover the container loosely with a cloth or plastic wrap. Let it rest at room temperature (around 70-75°F) for 24 hours to allow wild yeast and bacteria to activate. After 24 hours, discard half of the starter and add another 4 ounces of flour and 4 ounces of water. Repeat this feeding process daily for the next 6-7 days. Each feeding will help your starter grow stronger and more active. By day 7, your starter should be bubbly, frothy, and nearly double in size after each feeding. Once it reaches this stage, it’s ready to use in recipes. Keep in mind that consistency may vary, but with regular care, your starter will thrive and become a reliable baking companion. Patience is key—let nature do the work!

Signs Your Sourdough Starter is Ready

Your sourdough starter is ready to use when it exhibits consistent signs of activity and health. Look for a bubbly, frothy texture on the surface, indicating active fermentation. The starter should nearly double in size after feeding, showing a lively, energetic appearance. A sour aroma is another positive sign, as it signals the presence of lactic acid produced by the wild yeast and bacteria. Additionally, the starter should feel light and airy, with a smooth, even consistency. If it passes the “float test” by floating in water, it’s ready for baking. These signs confirm that your starter is active, healthy, and prepared to leaven your sourdough creations effectively. Observing these indicators ensures you’re using a robust starter for the best baking results.

Printable Sourdough Starter Creation Guide

Creating a sourdough starter is an exciting journey that requires patience and consistency. Below is a step-by-step guide to help you craft your very own sourdough starter:

  • Ingredients: 1/2 cup of warm water (around 90°F to 100°F) and 1/2 cup of flour (preferably unbleached all-purpose or whole grain).
  • Instructions:
    1. In a clean glass or ceramic container, mix the flour and water until smooth.
    2. Cover the container loosely and let it sit in a warm, draft-free place for 24-48 hours.
    3. After the initial fermentation, discard half of the starter and add another 1/2 cup of flour and water. Repeat this feeding process every 24 hours.
    4. Continue feeding your starter daily. Within 5-7 days, it should become bubbly, frothy, and nearly double in size after each feeding.
  • Signs of Readiness: A healthy starter should be active, bubbly, and have a slightly sour aroma.
  • Storage: Once active, store your starter in an airtight container in the refrigerator to slow down fermentation. Feed it once a week if not used regularly.

Print this guide and keep it handy as you embark on your sourdough baking adventures!

Feeding and Maintaining Your Sourdough Starter

Maintain your sourdough starter by feeding it twice daily if active, or once weekly if refrigerated. For consistency, use a glass container and feed at the same time each day.

Feeding Schedule for a Healthy Starter

A consistent feeding schedule is essential for maintaining a vibrant sourdough starter. If you plan to bake frequently, keep your starter at room temperature and feed it twice daily—once in the morning and once in the evening. Use a 1:1 ratio of flour to water by weight, ensuring the starter is bubbly and active before each feeding. If you bake less often, store your starter in the refrigerator and feed it once weekly. Always discard half of the starter before feeding to maintain its health and prevent over-fermentation. For best results, use the same type of flour consistently and adjust the feeding schedule based on your starter’s activity. Regular feeding ensures your sourdough starter remains robust and ready for baking. Printable guides can help you stay on track with feedings and care.

How to Store Your Sourdough Starter

Proper storage is crucial for maintaining the health and longevity of your sourdough starter. For active use, keep the starter at room temperature (around 70-75°F) in a clean, glass or ceramic container with a loose-fitting lid. If you bake frequently, this is ideal as it keeps the starter active and ready for use. For less frequent baking, store the starter in the refrigerator to slow down fermentation. Before refrigerating, discard half of the starter and feed it with fresh flour and water. Transfer it to an airtight container and store it in the fridge, feeding it once a week to keep it alive. When refrigerated, the starter becomes less active but will revive when brought back to room temperature and fed. Avoid using metal containers or lids, as they can react with the starter’s acidity. Always label the container with the date of the last feeding for easy tracking. This method ensures your starter remains healthy and ready for future bakes.

Tips for Maintaining a Consistent Starter

Maintaining a consistent sourdough starter requires attention to routine and environment. Stick to a regular feeding schedule, whether daily or weekly, to ensure your starter remains active and healthy. Use a digital scale for precise measurements of flour and water, as consistency in ratios is key. Choose a high-protein flour, like bread or all-purpose, to promote robust fermentation. Keep the starter in a draft-free area at room temperature, ideally between 70-75°F, to encourage steady activity. Avoid using metal containers or utensils, as they can inhibit the starter’s natural process. Cleanliness is essential—always use a clean container and washed hands when handling the starter. Observe your starter’s behavior and adjust feeding times based on its activity. If bubbles form quickly, it’s thriving; if not, it may need more frequent feeding. Print and post a feeding schedule or checklist to stay organized. By following these tips, you’ll cultivate a reliable, vibrant sourdough starter perfect for baking.

Printable Sourdough Starter Feeding Guide

A printable sourdough starter feeding guide is an invaluable tool for keeping your starter healthy and active. This guide provides a clear schedule and instructions for feeding your starter, ensuring consistency and preventing neglect. Whether you’re a beginner or an experienced baker, having a visual reminder can help you stay on track. The guide typically includes feeding times, flour-to-water ratios, and storage tips. Print it out and place it near your baking area or on the refrigerator for easy reference. Many guides also include space to track your starter’s progress, allowing you to adjust feeding schedules based on its activity. King Arthur Baking and Kettle & Kale offer excellent examples of such printable guides, which emphasize regular feeding and proper care. By following the guide, you’ll maintain a thriving sourdough starter, ready for baking whenever inspiration strikes. This simple yet effective resource ensures your sourdough journey remains enjoyable and stress-free.

Troubleshooting Common Issues

Troubleshooting your sourdough starter involves identifying common issues like inactivity or over-fermentation. If your starter isn’t bubbling, try refreshing it with fresh flour and water. For a dormant starter, gradual feeding can revive it. Always ensure proper storage and feeding schedules to prevent such problems.

What to Do If Your Starter Isn’t Active

If your sourdough starter isn’t active, don’t panic! First, check its environment. Ensure it’s at room temperature (around 75°F to 78°F) and in a clean, draft-free area. Next, assess its feeding schedule. A hungry starter can become sluggish, so try feeding it with fresh flour and water. Use a 1:1 ratio of flour to water by weight. Discard half of the starter before feeding to maintain balance. If it’s still inactive, consider the type of flour. Switch to an unbleached, all-purpose flour to provide necessary nutrients. Finally, give it time. Sometimes, starters need a few feedings to regain activity. If all else fails, you can create a new starter or seek advice from online resources. Patience and consistency are key to reviving your sourdough starter and getting it back to its bubbly, active state.

How to Revive a Dormant Sourdough Starter

Reviving a dormant sourdough starter requires patience and consistent care. Begin by bringing the starter to room temperature if it’s been refrigerated or frozen. Discard half of the starter to refresh it, then feed it with a 1:1 ratio of flour to water by weight. Use unbleached, all-purpose flour for optimal nutrition. Place the starter in a warm, draft-free environment, such as near the oven or in a sunny spot. Feed it twice daily, observing for signs of life like bubbles and expansion. If the starter remains inactive after a few days, consider changing the flour type or allowing more time for recovery. Remember, reviving a dormant starter can take several days, so persistence is key. If it shows no improvement, it may be necessary to create a new starter. With proper attention, your sourdough starter should regain its vitality and be ready for baking once again.

Using Your Sourdough Starter in Recipes

Unleash your creativity with your active sourdough starter by exploring a variety of recipes. From classic sourdough bread to pancakes, crackers, and even desserts, the possibilities are endless; Enhance every dish with its tangy flavor and airy texture.

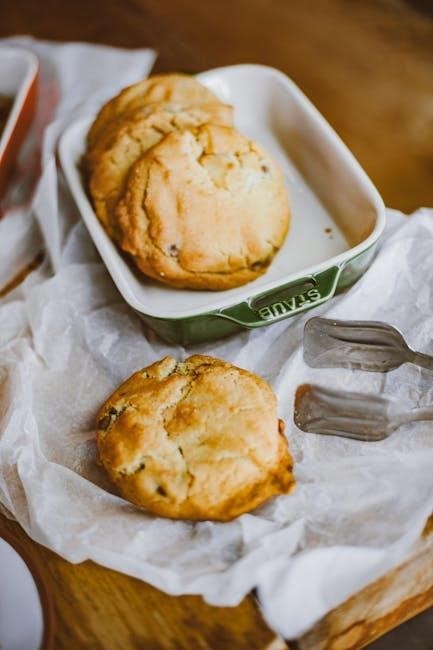
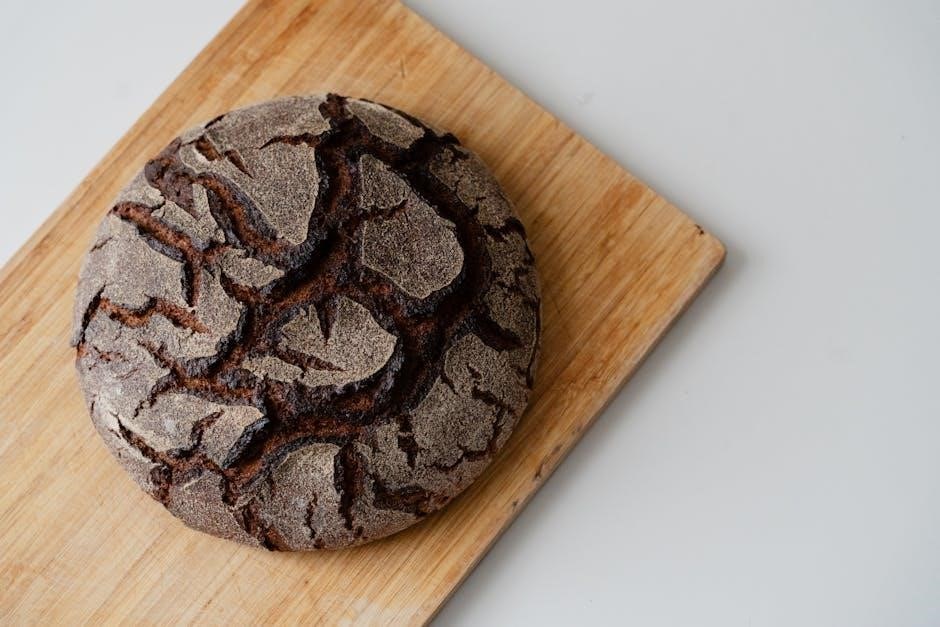
Basic Sourdough Bread Recipe

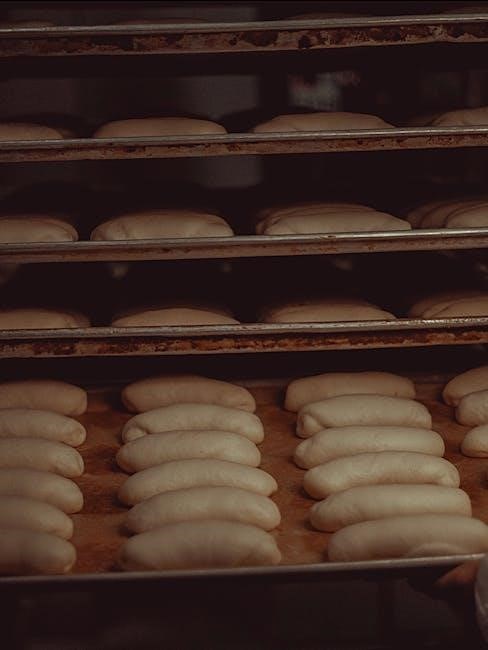
Creating a delicious sourdough bread starts with your active starter. In a large mixing bowl, combine 1 cup of warm water, 1 cup of sourdough starter, and 3 cups of bread flour. Mix until just combined, then add 1 teaspoon of salt and mix gently until a shaggy dough forms.

Cover the bowl with a damp cloth and let the dough rest for 20-30 minutes. After the autolyse, knead the dough on a floured surface for 5-10 minutes until smooth and elastic. Place the dough in a lightly oiled bowl, cover, and let it proof at room temperature for 4-6 hours, or until doubled in size.

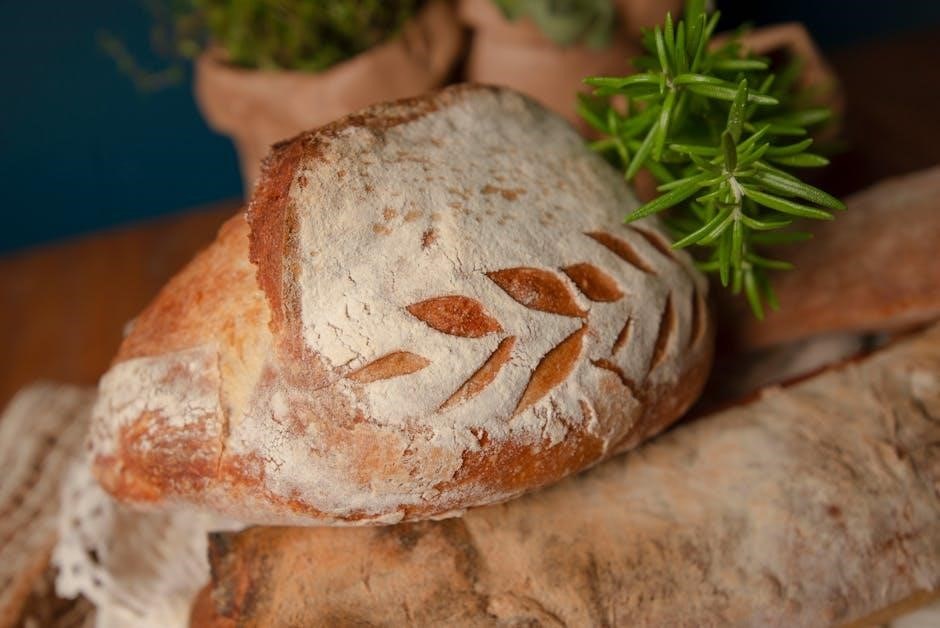
Gently shape the dough into a round or oblong loaf. Place it onto a baking sheet or bread peel lined with parchment paper. Cover and let it proof for another 2-3 hours. Preheat your oven to 450°F (230°C) with a Dutch oven or ceramic pot inside. Score the bread with a sharp knife or razor blade, then bake for 25-35 minutes, or until golden brown and hollow-sounding when tapped.

Let the bread cool on a wire rack for at least 1 hour before slicing. Enjoy your homemade sourdough bread with butter, jam, or your favorite spread!

Other Delicious Recipes Using Sourdough Discard

Don’t let your sourdough discard go to waste! It’s a versatile ingredient that can elevate a variety of dishes. Try making sourdough pancakes or waffles for a tangy breakfast treat—simply mix 1 cup of discard with flour, sugar, eggs, and a pinch of salt. For a crispy snack, use discard to make sourdough crackers by combining it with flour, water, and seasoning, then rolling it thin and baking until golden.

Another great option is sourdough pizza dough. Combine 1 cup of discard with flour, water, salt, and a drizzle of olive oil for a flavorful base. You can also use discard in muffins, cakes, or even as a booster in bread recipes.Experiment with sourdough discard to create unique and delicious treats while reducing waste in your kitchen.

For a savory delight, mix discard with herbs and cheese to make a tasty sourdough focaccia. The possibilities are endless, making sourdough discard a treasure for creative bakers!

How to Incorporate Your Starter into Various Dishes

Once your sourdough starter is active and healthy, it can be used in a variety of recipes beyond traditional bread. Substitute it for yeast in bread recipes or use it to enhance the flavor of pizza dough, pretzels, or even croissants. For a tangy twist, incorporate your starter into muffins, cakes, or cookies by replacing a portion of the flour and water with the starter.

When using your sourdough starter in recipes, ensure it’s at room temperature and recently fed for the best results. Start by replacing about 10% of the flour and water in a recipe with your starter, adjusting as needed for flavor and texture. This technique works well for creating sourdough versions of favorite treats like cinnamon rolls or sandwich bread.

Experiment with your sourdough starter to discover new ways to elevate your baking. Its unique tang and fermentation properties add depth to countless dishes, making it a versatile ingredient in your kitchen.

Printable Resources for Sourdough Baking

Download a Sourdough Baking Checklist to plan your bakes efficiently. Print a Sourdough Glossary of Terms for quick reference. These resources help you stay organized and informed, ensuring your sourdough journey is both enjoyable and successful.

Sourdough Baking Checklist

Stay organized with our printable Sourdough Baking Checklist, designed to guide you through every step of the baking process. This handy resource ensures you never miss a crucial step, from mixing to baking; Perfect for both beginners and experienced bakers, it includes:

  • Pre-bake preparation tips
  • Step-by-step dough handling instructions
  • Fermentation monitoring guidelines
  • Baking temperature and timing reminders
  • Post-bake cooling instructions

Print the checklist and keep it in your kitchen for easy reference. It’s a simple yet effective tool to help you achieve consistent, high-quality sourdough bread every time. Say goodbye to baking anxiety and hello to perfectly baked loaves with this essential guide!

Sourdough Glossary of Terms

Understanding the terminology behind sourdough baking is essential for mastering the craft. This glossary provides clear definitions of key terms to help you navigate recipes and instructions with confidence.

  • Sourdough Starter: A naturally occurring mixture of wild yeast and bacteria used to leaven bread.
  • Leavening: The process of dough rising due to gas produced by yeast fermentation.
  • Fermentation: The metabolic process where yeast converts sugars into carbon dioxide and alcohol.
  • Dough: The mixture of flour, water, salt, and starter before baking.
  • Proofing: The final rise of shaped dough before baking.
  • Bulk Fermentation: The initial rise after mixing, before shaping.
  • Shaping: Forming dough into its final bread form.
  • Scoring: Cutting the dough surface to control expansion during baking.
  • Crust: The outer layer of baked bread.
  • Sourdough Discard: The portion of starter removed during feeding.

This glossary is your go-to reference for understanding sourdough-specific terms, ensuring you’re equipped to tackle any recipe successfully.

Mastering a sourdough starter is a rewarding journey, offering endless baking possibilities. With patience and practice, you’ll enjoy fresh, flavorful bread and creations. Happy baking, and remember, your starter is a lifelong companion in the kitchen!

Final Tips for Successful Sourdough Baking

Consistency and patience are key to mastering sourdough baking. Always use a digital scale for precise measurements and maintain a consistent temperature during proofing. Experiment with recipes to find your favorite flavors, and don’t hesitate to adapt them based on your starter’s activity. Keep a baking journal to track your progress and note what works best for you. When storing your starter, ensure it’s fed before refrigeration to keep it healthy. For beginners, start with simple recipes like basic sourdough bread before exploring more complex creations. Finally, embrace the journey—sourdough baking is as much about the process as the product. Happy baking!

oven ready lasagna instructions

Oven-ready lasagna offers a convenient alternative to traditional lasagna, eliminating the need to boil noodles. It suits various recipes, from classic meat-based dishes to vegetarian delights, ensuring a hearty meal with minimal prep.

What is Oven-Ready Lasagna?

Oven-ready lasagna refers to pre-made lasagna sheets or noodles that require no boiling before baking. These convenient noodles absorb moisture during the baking process, eliminating the need for pre-cooking. They are designed to directly layer into a baking dish with your choice of sauce, cheese, and other ingredients. This innovation simplifies meal preparation, saving time and effort. Oven-ready lasagna is ideal for busy cooks, as it streamlines the traditional lasagna-making process while delivering a delicious, hearty dish. Its versatility allows for a wide range of recipes, from classic meat-based lasagnas to vegetarian and vegan variations, ensuring a satisfying meal every time.

Why Choose Oven-Ready Lasagna Noodles?

Oven-ready lasagna noodles are a time-saving alternative to traditional boiling. They eliminate the need for pre-cooking, simplifying the preparation process. These noodles absorb moisture during baking, ensuring they cook perfectly within the dish. This convenience is ideal for busy home cooks and professionals alike. Additionally, oven-ready noodles reduce kitchen cleanup and the risk of overcooking. Their texture remains consistent, providing a satisfying bite in every layer. This modern solution maintains the rich flavor of traditional lasagna while offering a hassle-free cooking experience, making it a practical choice for creating delicious, layered dishes efficiently.

Ingredients and Tools Needed

  • Ground beef, pasta sauce, ricotta, mozzarella, parmesan, and eggs.
  • 9×13-inch baking pan, non-stick cooking spray, skillet, and mixing bowl.

Essential Ingredients for Lasagna

The core ingredients for oven-ready lasagna include ground beef or alternative protein, pasta sauce, ricotta cheese, shredded mozzarella, grated parmesan, and eggs. Fresh or dried herbs like basil and oregano add flavor, while garlic enhances the sauce. Salt and pepper season the dish to perfection. For a vegetarian option, layer with spinach, mushrooms, or zucchini. These components create a balanced, hearty meal, with the oven-ready noodles absorbing flavors during baking. Ensure all ingredients are fresh for the best taste and texture.

Necessary Cooking Tools and Equipment

To prepare oven-ready lasagna, you’ll need a 9×13-inch baking dish, a large skillet for browning meat or sautéing vegetables, and a saucepan for heating the pasta sauce. A mixing bowl is essential for combining ricotta, cheese, and spices. A wooden spoon or spatula is ideal for layering ingredients. Measuring cups and spoons ensure accurate proportions; Aluminum foil is needed for covering the dish during baking. Optional tools include a toaster oven for reheating slices and a sharp knife for serving. These tools streamline the process, making it efficient to create a delicious, layered lasagna.

Preparation Steps

Start by preheating the oven to 350°F. Prepare the baking dish with a thin layer of sauce. Brown meat and mix with sauce if desired.

Preheating the Oven

Preheat your oven to 350°F (175°C) for oven-ready lasagna. Ensure the oven is fully preheated before placing the dish inside to promote even cooking. If using a convection oven, you may need to adjust the temperature slightly. Proper preheating ensures the lasagna cooks thoroughly and prevents undercooked noodles or uneven browning. Allow the oven to preheat for at least 10-15 minutes before baking. This step is crucial for achieving the best texture and flavor in your oven-ready lasagna.

Preparing the Baking Dish

Begin by selecting a 9×13-inch baking dish and lightly greasing it with non-stick cooking spray or a thin layer of olive oil. This prevents the lasagna from sticking and ensures easy removal of slices after baking. Place the dish on a larger baking sheet lined with aluminum foil to catch any spills during cooking. This step is especially useful for messy layers or excessive cheese melt. Properly preparing the baking dish ensures even cooking and prevents the lasagna from adhering to the pan, making serving much easier and reducing cleanup efforts.

Layering the Lasagna

Layer lasagna by alternating oven-ready noodles, rich meat sauce, and a creamy cheese mixture. Start with a thin sauce layer to prevent noodles from sticking. Each layer should be gently pressed to ensure even cooking. Finish with a generous topping of cheese for a golden, bubbly finish.

Building the First Layer

Start by spreading a thin, even layer of pasta sauce across the bottom of the baking dish to prevent the noodles from sticking. Arrange the oven-ready lasagna noodles in a single layer, ensuring they fit neatly without overlapping. Next, spread a layer of meat sauce over the noodles, followed by a layer of ricotta or cheese mixture. Sprinkle shredded mozzarella and Parmesan cheese generously to add flavor and texture. This foundational layer sets the stage for the subsequent layers, ensuring a balanced and delicious lasagna. Keep the layers uniform for even cooking and a cohesive final dish.

Adding Subsequent Layers

Continue building your lasagna by alternating layers of meat sauce, ricotta mixture, and shredded cheese. Repeat the process, starting with a layer of sauce, followed by oven-ready noodles, then the ricotta mixture, and finally a generous sprinkle of mozzarella and Parmesan. For vegetarian options, substitute the meat sauce with sautéed spinach or roasted vegetables. Ensure each layer is evenly spread to maintain a balanced flavor and texture. Repeat this process until all ingredients are used, finishing with a layer of cheese on top for a golden, bubbly crust. This method ensures a hearty, flavorful dish with every bite.

Baking Instructions

Bake the lasagna at 350-375°F, covered with foil for 30-40 minutes, then uncovered for an additional 10-15 minutes, until hot, bubbly, and golden on top.

Covered Baking Time and Temperature

Preheat your oven to 350-375°F (175-190°C). Place the lasagna in the oven, covered with aluminum foil, and bake for 30-40 minutes. This step ensures the pasta absorbs flavors and the dish cooks evenly. The foil traps steam, preventing the top from drying out. After 30-40 minutes, remove the foil and continue baking for an additional 5-10 minutes, or until the cheese is bubbly and golden brown. Ensure the internal temperature reaches 165°F (75°C) for food safety. Let it rest before serving for the best results. This method guarantees a perfectly cooked, moist lasagna every time.

Uncovered Baking for the Final Touch

After baking covered for 30-40 minutes, remove the foil to allow the top layer to crisp and brown. Increase the oven temperature to 375°F (190°C) if desired for a golden finish. Bake uncovered for an additional 5-10 minutes, watching closely to avoid burning. This step enhances the texture and appearance, creating a bubbly, golden crust. Ensure the cheese is fully melted and slightly caramelized. Let the lasagna rest for 10-15 minutes before serving to allow the layers to set. This final touch elevates the dish, making it visually appealing and perfectly cooked.

Post-Baking Steps

After baking, let the lasagna rest for 10-15 minutes to set layers. It’s now ready to serve and can be portioned into hearty slices.

Letting the Lasagna Rest

After baking, allow the lasagna to rest for 10-15 minutes before serving. This step is crucial as it helps the layers set, preventing the dish from falling apart. During this time, the cheese will firm up slightly, and the flavors will meld together. Covering it loosely with foil can retain warmth without trapping steam, ensuring the top remains crispy; A well-rested lasagna is easier to slice neatly and serves more cleanly, enhancing the overall presentation and dining experience.

Serving and Portioning

Once rested, slice the lasagna into even portions using a sharp knife. For standard servings, cut into 3×3-inch squares. Serve hot, garnished with fresh parsley or basil for added flavor and visual appeal. Pair with garlic bread or a side salad for a complete meal. For larger gatherings, consider slicing into smaller portions to accommodate more guests. Leftover slices can be reheated individually for convenience. Ensure each portion is neatly plated to maintain the dish’s appeal. This step finalizes the preparation, making the lasagna ready to enjoy after its journey from oven to table.

Storage and Reheating

Store cooked lasagna in an airtight container in the refrigerator for up to three days or freeze for up to three months. Thaw frozen lasagna overnight in the fridge before reheating at 350°F until hot and bubbly.

Storing Cooked Lasagna

Cooked lasagna can be stored in an airtight container in the refrigerator for up to three days. For longer storage, freeze it for up to three months. When freezing, ensure the lasagna is tightly wrapped in plastic wrap or aluminum foil to prevent freezer burn. Thaw frozen lasagna overnight in the refrigerator before reheating. Once thawed, reheat it in the oven at 350°F until hot and bubbly, ensuring even heating throughout. Proper storage maintains flavor and texture, keeping your lasagna fresh and ready for future meals.

Reheating Instructions

To reheat cooked lasagna, preheat your oven to 350°F (175°C). Place individual slices on a baking sheet or in a small baking dish, covering them with foil to retain moisture. Bake for 15-20 minutes, or until the cheese is melted and bubbly. For a toaster oven, use 325°F (160°C) for 10-15 minutes. If reheating a large portion, cover the dish with foil and bake at 350°F for 20-25 minutes. Let the lasagna rest for a few minutes before serving to ensure even heating. Reheating restores the dish to its original flavor and texture, making it perfect for quick meals.

Cooking Tips and Variations

Customize your lasagna with diverse ingredients like spinach, mushrooms, or ground beef. Alternate layers with ricotta, mozzarella, and Parmesan for rich flavor. Add herbs or spices for a unique twist, ensuring each layer complements the next. Experiment with vegetarian options by substituting meat with roasted vegetables or plant-based alternatives. For a crispy top, broil the lasagna briefly after baking. These variations allow you to create a dish that suits any taste, making oven-ready lasagna a versatile and crowd-pleasing meal option.

Customizing Your Lasagna Recipe

To make your lasagna unique, try adding different ingredients to each layer. Spinach, mushrooms, or zucchini can enhance the flavor and texture of the dish. For a meaty twist, incorporate ground beef or sausage into the sauce. Vegetarian options can be created by using roasted vegetables like eggplant or bell peppers. Cheese combinations are also versatile—mix ricotta with Parmesan for a creamy base, or add feta for a tangy surprise. Herbs like basil or oregano can add freshness, while spices like cumin or paprika offer a bold twist. These customizations allow you to tailor the recipe to your preferences, ensuring a personalized and delicious meal.

Common Mistakes to Avoid

  • Overbaking can dry out the lasagna, so stick to the recommended baking time and temperature.
  • Not letting the lasagna rest before serving causes layers to fall apart and sauce to spill.
  • Uneven layering can lead to dry spots or overly saucy areas, affecting the overall texture.
  • Using too much sauce may make the dish soggy, while too little can result in a dry, flavorless final product;
  • Skimping on cheese reduces flavor and creaminess, so ensure ample coverage in each layer.

Oven-ready lasagna is a convenient and delicious option for home cooks, offering a time-saving alternative to traditional methods. By following proper baking instructions and avoiding common mistakes, you can achieve a perfectly cooked, flavorful dish. Allowing the lasagna to rest before serving ensures the layers stay intact and the flavors meld together. Whether you’re a novice or an experienced cook, oven-ready lasagna is a crowd-pleaser that combines modern convenience with the rich, comforting taste of a classic Italian meal.

bissell crosswave instruction manual

The Bissell CrossWave is a versatile multi-surface cleaning device designed to combine vacuuming and mopping, perfect for hard floors and carpets․ Easy to use and effective․

1․1 Overview of the Bissell CrossWave

The Bissell CrossWave is a multi-surface cleaning machine designed to simplify your cleaning routine․ It combines the functions of a vacuum and mop, making it ideal for hard floors and carpets․ With its lightweight design and intuitive controls, the CrossWave is easy to maneuver and operate․ It is perfect for pet owners and households with diverse flooring types․ The device uses a dual-function design, allowing you to switch seamlessly between cleaning hard floors and carpets․ Its innovative brush roll captures debris while mopping, ensuring a thorough clean․ The CrossWave is a versatile and efficient solution for maintaining a clean and hygienic home environment․

1․2 Key Features of the Bissell CrossWave

The Bissell CrossWave boasts a multi-surface cleaning capability, allowing seamless transitions between hard floors and carpets․ Its dual-action brush roll captures debris while mopping, ensuring a thorough clean․ The machine features an easy-to-empty dirt tank and a washable filter, promoting hassle-free maintenance․ It is lightweight and ergonomic, making it easy to maneuver around furniture and stairs․ The CrossWave is also designed with pet owners in mind, effectively picking up pet hair and dander․ Additionally, it operates quietly and comes with adjustable cleaning modes, making it suitable for various cleaning needs․ Its innovative design ensures efficient and effective cleaning across different surfaces․

1․3 What’s Included in the Box

The Bissell CrossWave box includes the main cleaning unit, a detachable handle, a hard floor brush roll, a carpet brush roll, a multi-surface cleaning solution, a measuring cup, and a dirt tank․ Additionally, you’ll find a washable pre-filter and a post-filter to help maintain the machine’s performance․ The package also includes a user manual with setup and operating instructions․ Some models may come with extra accessories like a storage bag or additional cleaning pads․ Everything you need to start cleaning is conveniently packed in the box for a seamless experience․

Safety Precautions

Always ensure a safe environment when using the Bissell CrossWave․ Avoid water puddles, hot surfaces, and non-genuine parts․ Do not modify the device or submerge it in water to prevent hazards and maintain warranty coverage for safety․

2․1 General Safety Tips

Always read the manual thoroughly before use․ Ensure the area is clear of obstacles and avoid using the device near water sources or on uneven surfaces․ Do not modify the Bissell CrossWave, as this may cause malfunctions or safety hazards․ Keep loose clothing and long hair tied back while operating․ Avoid using the device in areas with open flames or sparks․ Ensure children and pets are kept at a safe distance during operation․ Never leave the device unattended while in use․ Use only Bissell-approved parts and accessories to maintain safety and performance standards․

2․2 Usage Restrictions

The Bissell CrossWave is designed for indoor use on sealed hard floors and carpets․ Avoid using it on non-sealed wood, unfinished surfaces, or floors with wax finishes․ Do not use the device on thick, high-pile rugs or shag carpets, as this may damage the brush roll․ Never use the CrossWave outdoors, in wet or flooded areas, or near open flames․ Avoid cleaning hot or glowing surfaces, as this may damage the machine․ The device is not intended for use by children or individuals with mobility impairments without adult supervision․ Always ensure the floor is free of sharp objects or debris that could cause damage․

2․3 Proper Handling and Storage

Handle the Bissell CrossWave with care to avoid damage․ Store it upright in a dry, cool place, away from direct sunlight․ Always unplug the machine before storing․ The dirt tank and filter should be cleaned and dried thoroughly after each use to prevent mold or bacteria growth․ Do not store the device with water or cleaning solution in the tank․ If storing for an extended period, charge the battery to 50% capacity to maintain its health․ Ensure all components are securely attached to prevent damage during storage․

Assembly and Setup

Unbox and inspect all components․ Attach the handle securely, ensure proper alignment, and tighten all connections․ Plug in and charge the device before first use․

3․1 Unboxing and Initial Inspection

Welcome to the Bissell CrossWave setup guide! Carefully open the box and verify all components are included: the machine, handle, brush rolls, cleaning solution, and user manual․ Inspect each part for damage․ If any items are missing or damaged, contact Bissell customer support immediately․ Ensure the device is fully assembled as per the manual․ Familiarize yourself with the controls and features․ Before proceeding, double-check that all parts are in pristine condition for optimal performance․ Save the packaging for future storage or transportation needs․

3․2 Attaching the Handle and Other Components

To assemble the Bissell CrossWave, begin by attaching the handle․ Align the handle with the base unit, ensuring it clicks securely into place․ Tighten any screws or clips as needed․ Next, install the brush roll by removing the default one and inserting the appropriate roll for your floor type․ Use the easy-release pedal to swap rolls quickly․ Finally, attach any additional accessories, such as the cleaning solution tank, by following the manual’s guidelines․ Ensure all parts are securely fitted before use․ Refer to the manual for detailed diagrams if needed․

3․3 Preparing the Cleaning Solution

For optimal cleaning, prepare the Bissell CrossWave cleaning solution by following these steps․ Fill the water tank with warm water, then add the recommended Bissell cleaning formula․ Avoid using harsh chemicals or generic cleaners, as they may damage the machine or void the warranty․ Shake the tank gently to mix the solution evenly․ Ensure the tank is securely attached to the device before operation․ Always refer to the formula’s instructions for the correct dilution ratio․ Proper preparation ensures effective cleaning and prolongs the machine’s lifespan․ Regularly clean the tank to prevent residue buildup․ Always use Bissell-approved solutions for best results․

Operating the Bissell CrossWave

Press the power button to turn on the machine․ Use the mode selector to choose between hard floor or carpet cleaning․ Adjust settings as needed for optimal results․

4․1 Turning On the Machine

To turn on the Bissell CrossWave, ensure it is properly assembled and plugged into a power outlet․ Check that the dirt tank is securely attached and the brush roll is free from obstructions․ Press the power button, located on the handle, to activate the machine․ You will hear a gentle hum as it powers up․ Use the mode selector to choose between hard floor or carpet cleaning․ Adjust the suction control if needed, depending on the surface type․ Always ensure the machine is turned off when not in use or during maintenance․

4․2 Selecting the Right Cleaning Mode

The Bissell CrossWave features multiple cleaning modes to suit different surfaces and cleaning needs․ For hard floors, select the Hard Floor Mode for a gentle yet effective clean․ For carpets and rugs, switch to Carpet Mode to engage the brush roll and deep clean fibers․ Use the Turbo Mode for tough stains or high-traffic areas by pressing the turbo button․ Adjust the mode using the selector located on the machine’s handle․ Ensure the mode matches your surface type for optimal results․ Always test a small area first to confirm the mode is appropriate for your cleaning task․

4․3 Navigating Different Floor Types

The Bissell CrossWave is designed to work seamlessly on various floor types․ For hard floors, use the hard floor brush to gently clean surfaces like tile, wood, or laminate․ When transitioning to carpets or rugs, switch to carpet mode and use the brush roll for deeper cleaning․ For pet areas, the pet brush tool can be attached to tackle stubborn stains and odors․ Always adjust the cleaning mode and tool based on the floor type to ensure the best results․ Regularly check the brush roll for debris to maintain performance across all surfaces․

Cleaning Hard Floors

The Bissell CrossWave excels at cleaning hard floors, effectively picking up dirt and debris․ Use the hard floor brush for gentle yet thorough cleaning․ Always use Bissell’s cleaning solution for optimal results․

5․1 Preparation for Hard Floor Cleaning

Before cleaning hard floors with your Bissell CrossWave, clear the area of large debris, toys, or items that could obstruct the machine․ Sweep or vacuum loose particles to ensure effective cleaning․ For stubborn stains or high-traffic areas, pre-treat with Bissell’s hard floor cleaning solution․ Ensure the tank is filled with the recommended solution and water mixture․ Always use the hard floor brush attachment to prevent scratching surfaces․ Check for any damage or rough spots on the floor and avoid them․ Proper preparation ensures a smooth and efficient cleaning experience․

  • Clear large debris and obstructions․
  • Pre-treat stubborn stains with Bissell solution․
  • Use the hard floor brush attachment․
  • Fill the tank with the correct solution mixture․

5․2 Using the Hard Floor Brush

Attach the hard floor brush to the Bissell CrossWave by aligning the connection points and securing it firmly․ This brush is designed for gentle yet effective cleaning of hard surfaces․ When cleaning, move the machine in slow, even strokes, working in sections․ Use the cleaning solution dispensed by the machine to mop as you go․ The brush’s soft bristles are safe for most hard floors, including tile, wood, and laminate․ For tougher dirt, increase the solution flow but avoid applying too much pressure, which could damage the floor․ Regularly cleaning the brush after use ensures optimal performance․

  • Attach the hard floor brush securely․
  • Use slow, even strokes for coverage․
  • Adjust solution flow for tougher areas․
  • Avoid excessive pressure to protect floors․
  • Clean the brush after each use․

5․3 Tips for Effective Hard Floor Cleaning

For optimal results, clean hard floors regularly to prevent dirt buildup․ Always pre-sweep or vacuum to remove debris before mopping․ Use the recommended cleaning solution to maintain floor finish and machine performance․ Avoid using harsh chemicals, as they may damage surfaces or harm the CrossWave․ For stubborn stains, pause and scrub gently before resuming․ Dry floors with a clean towel after cleaning to prevent slipping and water spots․ Regularly rinse and clean the hard floor brush to ensure effectiveness․ Follow these tips to keep your hard floors looking their best and extend the life of your Bissell CrossWave․

  • Pre-sweep or vacuum before mopping․
  • Use recommended cleaning solutions․
  • Scrub gently on stubborn stains․
  • Dry floors after cleaning․
  • Clean the brush regularly․

Cleaning Carpets and Rugs

The Bissell CrossWave seamlessly transitions to carpet mode, offering gentle yet effective cleaning for rugs and carpets․ Regular deep cleaning helps maintain freshness and appearance, ensuring optimal results․

6․1 Switching to Carpet Mode

To switch to Carpet Mode, locate the mode selection button on the handle․ Press it until the indicator light shows the carpet setting․ The machine will automatically adjust suction power and brush roll speed for carpets․ Ensure the carpet brush roll is installed before use․ You may hear a slight change in motor sound as the machine adapts․ For optimal results, test the mode on a small, inconspicuous area first to ensure proper cleaning without damage․ Adjust settings as needed for different carpet types or thickness․

6․2 Using the Carpet Brush Roll

For optimal carpet cleaning, attach the Carpet Brush Roll to the Bissell CrossWave․ Align the brush roll connections with the machine’s base and click it into place until it secures․ Before use, inspect the brush roll for debris and clean it with the provided cleaning tool if necessary․ Once installed, the brush roll will rotate automatically in Carpet Mode, gently agitating carpet fibers․ For deeper cleaning, increase the machine’s suction power if needed․ Always test a small area first to ensure the brush roll doesn’t damage delicate carpeting․ Regular maintenance, like cleaning hair or debris, ensures consistent performance․

6․3 Deep Cleaning Pet Stains and Odors

For deep cleaning pet stains and odors, use the Carpet Brush Roll in Carpet Mode․ Pre-treat stains with a pet stain formula, letting it sit for 5 minutes․ Avoid harsh chemicals․ Apply the cleaning solution using the CrossWave, working in slow, overlapping passes․ Repeat if necessary․ Rinse thoroughly and blot dry to prevent moisture buildup․ Regular deep cleaning helps eliminate embedded odors․ For severe stains, consider multiple passes or additional cleaning products․ Always test a small area first to ensure no damage to carpet fibers․ Regular maintenance ensures optimal performance for pet owners․

Emptying and Cleaning the Dirt Tank

Regular maintenance of the Dirt Tank is essential for optimal performance of your Bissell CrossWave․ Always empty and clean it after each use to prevent odor buildup and maintain hygiene․

7․1 Removing and Emptying the Dirt Tank

To ensure proper maintenance, always empty the Dirt Tank after each use․ Begin by turning off the machine and ensuring it is cool․ Locate the tank release buttons on the rear or side of the device․ Press these buttons to detach the tank from the main unit․ Carefully carry the tank to a trash can or drain․ Open the tank lid and pour out the contents․ For thorough cleaning, rinse the tank with warm water if needed․ Always wear gloves to avoid direct contact with dirt and cleaning solution residue․ Replace the tank securely after cleaning and rinsing․

7․2 Cleaning the Tank and Filter

Regularly cleaning the Dirt Tank and filter is essential for maintaining your Bissell CrossWave’s performance․ After emptying the tank, rinse it thoroughly with warm water to remove any remaining debris․ Use a mild detergent and a soft brush to scrub away stubborn dirt or stains․ Rinse the tank again until clean․ For the filter, gently tap it to remove loose particles, then wash it with warm soapy water․ Allow both the tank and filter to dry completely before reattaching them to the machine․ This prevents mold growth and ensures optimal suction and cleaning efficiency․ Always check for blockages to maintain proper function․

7․3 Reattaching the Tank

To reattach the Dirt Tank, align it with the base of the Bissell CrossWave and gently push it down until it clicks securely into place․ Ensure the tank is properly seated to avoid leaks․ Check that the rubber gasket is aligned and sealing correctly․ Once attached, double-check the connection by tugging lightly on the tank․ For optimal performance, ensure the tank is completely dry and free of debris before reattachment․ Finally, plug in the machine and test the suction briefly to confirm everything is working properly․ Proper reattachment ensures efficient cleaning and prevents water or debris from spilling during use․

Maintenance and Upkeep

Regular maintenance and upkeep are essential for optimal performance․ Clean the machine, replace parts, and store it properly to extend its life․ Follow the steps below․

8․1 Regular Cleaning of the Machine

Regular cleaning ensures optimal performance and longevity․ Empty the dirt tank after each use and rinse it with warm water․ Clean the pre-filter by tapping it gently to remove debris or washing it with mild detergent․ Wipe down the machine’s exterior and handle with a damp cloth․ Check and clean the brush rolls and suction path for hair or debris buildup․ Allow all parts to dry completely before storing․ Regular maintenance prevents mold growth and keeps the machine functioning efficiently․ Consistent cleaning also helps maintain suction power and overall hygiene․

8․2 Replacing the Brush Rolls

To maintain performance, replace the brush rolls every 6-12 months or when showing signs of wear․ Turn off and unplug the machine․ Press the release buttons on either side of the brush roll compartment to open it․ Gently pull out the old brush roll and discard it․ Insert the new brush roll, ensuring it clicks into place․ Close the compartment and plug in the machine․ For optimal cleaning, always use genuine Bissell replacement brush rolls․ Regular replacement prevents poor suction and ensures effective cleaning on all surfaces․ Refer to the manual for diagrams or contact customer support if needed․

8․3 Storing the Bissell CrossWave

Store the Bissell CrossWave in a cool, dry place, away from direct sunlight․ Ensure the dirt tank is empty and the water tank is completely dry․ For extended storage, clean and dry the brush rolls thoroughly․ Keep the machine upright to save space and protect the brush rolls․ Store the power cord neatly wrapped around the cord hooks․ Avoid storing in areas where children or pets may access it․ Always ensure all components are secure before storing to prevent damage․ Proper storage helps maintain the machine’s performance and longevity․

Troubleshooting Common Issues

Troubleshooting common issues with the Bissell CrossWave involves addressing problems like reduced suction, error indicators, or machine malfunction, ensuring optimal performance and extending its lifespan․

9․1 Machine Not Turning On

If the Bissell CrossWave fails to turn on, first check the power source and ensure it is properly plugged in․ Verify the outlet is functioning by testing with another device․ Inspect the power cord for damage or tangles․ If using a battery, ensure it is fully charged and correctly installed․ Check for blockages in the dirt tank or brush rolls, as excessive debris can prevent operation․ Also, examine the on/off switch for damage or malfunction․ If issues persist, consult the user manual or contact Bissell customer support for further assistance․

9․2 Reduced Suction Power

If the Bissell CrossWave experiences reduced suction power, check for blockages in the hose, dirt tank, or brush rolls․ Ensure the pre- and post-filters are clean or replaced as needed․ Empty the dirt tank regularly to maintain airflow․ If hair or debris is wrapped around the brush roll, remove it to restore suction․ Also, verify that the machine is properly assembled and all connections are secure․ For persistent issues, reset the device by turning it off, unplugging it, and restarting after a few minutes․ If problems continue, contact Bissell customer support for assistance․

9․3 Error Indicators and Solutions

If the Bissell CrossWave displays error indicators, refer to the user manual for specific codes․ Common issues include a malfunctioning brush roll or clogged pre-filter․ For brush roll errors, ensure it is clean and properly installed․ If the pre-filter is clogged, rinse it with clean water and allow it to dry before reinstalling․ For persistent issues, reset the machine by unplugging it, waiting 10 seconds, and plugging it back in․ If error indicators remain, contact Bissell customer support for further assistance or potential repair options․

Warranty and Customer Support

Your Bissell CrossWave is backed by a limited warranty․ For warranty details or assistance, visit Bissell’s official website or contact their dedicated customer support team for guidance․

10․1 Understanding the Warranty

The Bissell CrossWave is covered by a limited warranty that protects against defects in material and workmanship․ The warranty period varies by region and product model․ It typically covers repairs or replacements for faulty parts within the specified timeframe․ To ensure coverage, keep your purchase receipt and register your product․ The warranty excludes damage caused by misuse, neglect, or normal wear and tear․ For full warranty terms, visit the Bissell website or refer to the warranty document provided with your purchase․ Proper registration ensures seamless support and validates your warranty coverage․

10․2 Registering Your Product

Registering your Bissell CrossWave ensures warranty validation and access to exclusive support․ Visit the Bissell website and navigate to the product registration page․ Enter your product details, including the model number and purchase date․ Provide your contact information to complete the process․ Registration helps Bissell provide tailored support and notifications about updates or recalls․ Keep your purchase receipt and registration confirmation for future reference․ This step is crucial for maintaining warranty coverage and ensures you receive the full benefits of Bissell’s customer support services․

10․3 Contacting Bissell Customer Support

For assistance with your Bissell CrossWave, visit the official Bissell website and navigate to the “Support” section․ You can contact customer support via phone, email, or live chat․ Have your product’s model number and purchase date ready for faster service․ Additionally, the Bissell website offers a comprehensive FAQ section and downloadable resources․ For warranty-related inquiries, ensure your product is registered․ Representatives are available to address concerns, provide troubleshooting guidance, and assist with repair or replacement options․ Visit www․bissell․com for more details․

trampoline net instructions

Trampoline net instructions provide a comprehensive guide to ensuring safe and enjoyable jumping experiences. They cover installation, maintenance, and safety protocols to prevent accidents and extend net longevity effectively always.

Overview of Trampoline Net Safety

Trampoline net safety is essential to ensure a secure and enjoyable jumping experience for users of all ages. The primary purpose of a trampoline net is to enclose the jumping area, preventing jumpers from falling off the trampoline and reducing the risk of injuries. A sturdy, well-designed net acts as a protective barrier, while also providing visibility for supervision. Proper installation, regular maintenance, and adherence to weight and age limits are critical to maintaining the net’s integrity. Additionally, padding around the trampoline frame and springs can further enhance safety. By following trampoline net instructions and guidelines, users can minimize potential hazards and create a safer environment for recreational or competitive use. Prioritizing safety measures ensures that the trampoline remains a fun and secure activity for everyone involved.

Types of Trampoline Nets Available

Trampoline nets come in various styles and designs to cater to different needs and preferences. The most common type is the standard enclosure net, which surrounds the trampoline perimeter to prevent falls. Premium trampoline nets are made from heavier-duty materials for increased durability and safety. Some nets feature zippered entrances for easy access and added security, while others may include reinforced stitching for extra strength. There are also netless trampoline designs that rely on spring padding and mat thickness for safety. Additionally, specialized nets are available for specific trampoline models, such as rectangular or oval-shaped frames. Each type offers unique benefits, ensuring users can choose the net that best fits their trampoline setup and safety requirements.

Importance of Following Trampoline Net Instructions

Following trampoline net instructions is crucial for ensuring safety, durability, and optimal performance. Proper installation and maintenance prevent accidents by securing the net tightly and evenly, reducing the risk of falls and injuries. Adhering to guidelines also extends the lifespan of the net by avoiding unnecessary wear and tear. Additionally, correct setup ensures compliance with safety standards, providing peace of mind for users. Ignoring instructions can lead to loose attachments, torn nets, or structural damage, compromising safety and requiring costly repairs. By following the provided instructions, users can enjoy a safe and enjoyable trampoline experience while maintaining the integrity of the equipment. Regular checks and proper storage during harsh weather further enhance safety and longevity, making adherence to instructions essential for a hassle-free and secure trampoline setup.

Safety Considerations for Trampoline Net Installation

Ensure adult supervision during installation and use. Use proper tools and follow manufacturer guidelines to avoid accidents. Check weather conditions and secure attachments firmly for stability and safety.

Choosing the Right Net for Your Trampoline

Selecting the appropriate net for your trampoline is crucial for safety and durability. Consider the trampoline’s size, shape, and the number of users. Ensure the net matches the trampoline’s dimensions precisely to avoid gaps. Choose durable, weather-resistant materials like polyester or nylon for longevity. Look for nets with sturdy stitching and reinforced attachment points. Weight and age limits should align with the intended users. Consider additional features like padding on the poles or a zippered entrance for convenience. Always follow the manufacturer’s guidelines for compatibility and safety standards. Proper fit and quality ensure optimal performance and protection for jumpers of all ages. By prioritizing these factors, you can create a safer and more enjoyable trampoline experience for everyone. Regular inspections are also essential to maintain the net’s integrity and performance over time. A well-chosen net enhances both fun and safety, making it a worthwhile investment. Always adhere to safety recommendations to maximize enjoyment and minimize risks. Ensure the net is securely attached to prevent accidents and provide a reliable barrier during use. A good net not only protects users but also extends the lifespan of your trampoline. Choose wisely to create lasting memories and peace of mind for years to come. A properly fitted net is the cornerstone of a safe and enjoyable trampoline experience. It ensures that jumpers stay within the designated area and reduces the risk of injuries. Selecting the right net is an investment in safety, durability, and fun for the entire family. Make sure to evaluate all options carefully to find the best fit for your trampoline. The right net will provide years of reliable service and contribute to a positive trampoline experience. Always prioritize quality and compatibility when making your decision. A well-selected net is essential for maximizing safety and enjoyment. It ensures that your trampoline remains a fun and secure environment for everyone. By choosing the right net, you can enjoy peace of mind while your family has fun. Safety should always be the top priority when selecting a trampoline net. A proper fit and high-quality materials are key to ensuring a safe and enjoyable experience. Take the time to research and compare different options to find the best net for your trampoline. The right choice will provide lasting safety and satisfaction for years to come. Always consider the specific needs of your family and the trampoline’s intended use when selecting a net. This ensures that the net meets all necessary safety and performance requirements. A well-chosen net is a vital component of a safe and enjoyable trampoline setup. Invest in quality to protect your family and extend the life of your trampoline. The right net will provide a secure and fun environment for jumpers of all ages. Choose wisely to ensure safety, durability, and endless enjoyment. A properly selected net is the foundation of a safe and enjoyable trampoline experience. It ensures that users stay protected and the trampoline remains in great condition. Always prioritize quality and compatibility when choosing a net for your trampoline. This investment will pay off with years of safe and happy jumping. The right net enhances the overall trampoline experience and provides peace of mind for parents. Take the time to select a net that meets your family’s needs and adheres to safety standards. A well-chosen net is a worthwhile investment in safety and fun. It ensures that your trampoline remains a safe and enjoyable place for everyone. Always consider factors like size, material, and weight limits when selecting a net. These elements are crucial for safety and performance. A properly fitted net will prevent accidents and extend the life of your trampoline. Choose a net that aligns with your trampoline’s specifications and your family’s needs. This ensures a safe and enjoyable experience for all users. The right net is essential for maximizing safety and fun on your trampoline. It provides a secure barrier and withstands regular use. Always select a net that is durable, compatible, and meets safety standards. This investment will ensure years of safe and enjoyable jumping for your family. A well-selected net is a key component of a safe trampoline setup. It protects users and ensures the trampoline remains in good condition. Always choose a net that fits your trampoline perfectly and is made from high-quality materials. This will provide a secure and enjoyable environment for jumpers of all ages. The right net enhances safety, durability, and fun, making it a vital part of your trampoline experience. Always prioritize quality and compatibility when selecting a net for your trampoline. This ensures a safe and enjoyable experience for everyone. A properly chosen net is essential for maximizing safety and fun on your trampoline. It provides a secure barrier and withstands regular use. Always select a net that is durable, compatible, and meets safety standards. This investment will ensure years of safe and enjoyable jumping for your family. A well-selected net is a key component of a safe trampoline setup. It protects users and ensures the trampoline remains in good condition. Always choose a net that fits your trampoline perfectly and is made from high-quality materials. This will provide a secure and enjoyable environment for jumpers of all ages. The right net enhances safety, durability, and fun, making it a vital part of your trampoline experience. Always prioritize quality and compatibility when selecting a net for your trampoline. This ensures a safe and enjoyable experience for everyone.

Understanding Weight and Age Limits

Understanding weight and age limits is essential for safe trampoline use. These limits ensure the trampoline net and frame can support the users without compromising safety. Always check the manufacturer’s guidelines to determine the maximum weight capacity and recommended age range for your trampoline. Exceeding these limits can lead to equipment damage or injuries. Age limits are typically based on the physical strength and coordination of children, with younger users requiring stricter supervision. Adhering to these guidelines helps prevent accidents and ensures a fun experience for everyone. Remember, safety should never be compromised by ignoring weight or age restrictions. Regularly review and update your understanding of these limits as your family’s needs evolve. Proper adherence ensures the trampoline remains a safe and enjoyable activity for years to come. Always prioritize these guidelines to protect users and maintain the integrity of your trampoline setup. Safety first is the golden rule for trampoline fun.

Preparing the Trampoline for Net Installation

Before installing the trampoline net, ensure the trampoline is properly prepared. Clear the area around the trampoline to avoid any obstacles or hazards. Inspect the trampoline frame for any damage or wear, such as bent poles or loose connections, and repair them if necessary. Remove any debris, toys, or accessories from the trampoline surface to ensure a clean working area. Check that all springs and padding are securely attached and in good condition. Finally, gather all the necessary tools and materials, such as the net, hooks, and instruction manual, and place them within easy reach. A well-prepared trampoline ensures a smooth and safe net installation process. Proper preparation also helps prevent delays and potential safety issues during the installation. Always double-check that the trampoline is stable and level before proceeding. This step is crucial for a secure and even net fitting.

Step-by-Step Installation Guide

A step-by-step installation guide ensures a secure trampoline net setup. Start by gathering tools, then attach the net to the frame, and tighten all connections for safety.

Gathering Necessary Tools and Materials

Before installing the trampoline net, ensure you have all required tools and materials. Common items include a spring hook, screwdriver, wrench, measuring tape, and safety gloves. Additionally, check the manufacturer’s instructions for specific components like net hooks or ties. Organize these tools in a convenient location to streamline the installation process. It’s also wise to have a ladder or step stool for safe access to the trampoline frame. Always verify that all materials are compatible with your trampoline model to ensure a proper fit. Preparing these items beforehand will save time and minimize delays during the setup. Remember to wear protective gear, such as gloves and safety goggles, to prevent injuries while working with sharp or heavy objects. Proper preparation is key to a smooth and efficient installation experience.

Attaching the Net to the Trampoline Frame

Attaching the net to the trampoline frame requires precision and care. Begin by aligning the net’s attachment points with the frame’s hooks or ties. Start at the bottom of the frame and work your way up, ensuring the net is evenly distributed. Use the provided hooks, ties, or elastic cords to secure the net tightly. Make sure each attachment is firmly connected to prevent slack. Avoid over-tightening, as this could damage the net or frame. Check the alignment by gently tugging on the net to ensure it’s centered and evenly spaced. Once all attachments are secure, inspect the net for proper tension and alignment. This step is crucial for ensuring the net performs safely and effectively during use. Always refer to the manufacturer’s instructions for specific attachment methods tailored to your trampoline model.

Securing the Net Tight for Safe Use

Securing the trampoline net tightly is essential for safe use. Start by ensuring all straps, springs, or elastic cords are properly attached to both the net and the frame. Tighten the net evenly by pulling it firmly from multiple points to avoid slack. Use the provided tools, such as wrenches or straps, to tighten connections. Double-check each attachment point for stability. Once secured, test the net by gently tugging on it to ensure there is no loose fabric. Proper tension prevents accidents and ensures jumpers stay within the trampoline area. Always refer to the manufacturer’s guidelines for specific tightening instructions. A tightly secured net not only enhances safety but also prolongs the lifespan of the trampoline and net.

Troubleshooting Common Issues

Identify loose or damaged net attachments promptly; Repair tears or holes to maintain safety. Adjust net tension regularly for optimal performance and ensure secure use always.

Identifying Loose or Damaged Net Attachments

Regularly inspect the trampoline net attachments for signs of wear, such as fraying, tears, or rust. Check the springs and hooks for proper alignment and tightness. Look for any gaps or sagging in the net, which may indicate loose connections. After heavy use or harsh weather, ensure all straps and clips are secure. If you notice any damage, discontinue use until repairs are made. Neglecting loose or damaged attachments can lead to accidents or further net deterioration. Always prioritize thorough inspections to maintain safety and durability. Addressing these issues promptly ensures the trampoline remains a fun and secure environment for users of all ages.

Repairing Tears or Holes in the Net

To repair tears or holes in the trampoline net, start by assessing the size and location of the damage. For small holes, use a patch kit specifically designed for trampoline nets. Clean the area around the tear to ensure proper adhesion. Apply the patch according to the manufacturer’s instructions, usually involving a strong adhesive or sewing. For larger holes, sewing may be necessary, using heavy-duty thread and a needle. If the damage is extensive, consider replacing the net entirely. Regular inspections can help catch tears early, preventing further damage. Always follow the manufacturer’s repair guidelines to ensure safety and maintain the net’s integrity. Proper repairs will extend the net’s lifespan and ensure safe use for everyone.

Adjusting Net Tension for Optimal Performance

Adjusting net tension is crucial for ensuring the trampoline net performs safely and effectively. Start by inspecting the net for any sagging or uneven areas. Use the provided adjustment tools, such as straps or wrenches, to tighten the net evenly around the frame. Over-tightening can cause stress on the net, while under-tightening may lead to poor performance. Check the tension regularly, especially after harsh weather conditions, as temperature changes can affect the material. For optimal results, follow the manufacturer’s guidelines for the recommended tension level. Properly tensioned nets provide better bounce control, reduce wear and tear, and minimize the risk of accidents. Regular adjustments will help maintain the net’s integrity and ensure a safe, enjoyable experience for users.

Maintenance and Care Tips

Regular cleaning and inspections are essential for maintaining trampoline net durability. Remove dirt and debris, check for wear, and store the net during harsh weather to ensure longevity and safety.

Cleaning the Trampoline Net Regularly

Regular cleaning is crucial for maintaining the trampoline net’s durability and safety. Use a mild detergent mixed with warm water and a soft-bristle brush to gently scrub away dirt and debris. Avoid harsh chemicals or abrasive materials that could damage the net material. Rinse thoroughly with a garden hose to remove soap residue. For tougher stains, allow the solution to sit for a few minutes before scrubbing. Clean the net after heavy use or exposure to bad weather. Allow it to air dry completely to prevent mildew. Regular cleaning not only ensures a safe jumping experience but also extends the net’s lifespan. Additionally, inspect the net during cleaning for any signs of wear or damage that may need immediate attention.

Inspecting the Net for Wear and Tear

Inspecting the trampoline net for wear and tear is essential to ensure safety and longevity. Start by examining the net for frayed edges, holes, or loose threads, which can weaken its structure. Check the attachment points to the trampoline frame for signs of damage or loosening. Look for any discoloration or mildew, which may indicate exposure to harsh weather. Regular inspections help identify issues early, preventing accidents and costly repairs. Use a flashlight to spot small tears or weaknesses, especially in areas prone to stress. If damage is found, address it immediately by patching holes or replacing the net if necessary. Neglecting inspections can lead to safety hazards, so make it a routine part of trampoline maintenance, especially after heavy use or extreme weather conditions.

Storing the Net During Harsh Weather Conditions

Storing the trampoline net during harsh weather conditions is crucial to preserve its quality and longevity. Before storage, clean the net thoroughly to remove dirt, debris, or mildew. Allow it to dry completely to prevent mold growth. Use a breathable storage bag or cover to protect the net from moisture and pests. Avoid folding the net excessively, as this can cause creases or damage. Store it in a cool, dry place away from direct sunlight and extreme temperatures. Ensure the storage area is free from rodents or insects that might chew through the material. Proper storage ensures the net remains in good condition for future use, preventing unnecessary repairs or replacements.

minky wash instructions

Minky fabric is a super-soft, plush material made from synthetic fibers, known for its luxurious texture and durability; It’s popular for baby products, blankets, and home decor, offering a soft, velvety feel that’s gentle on the skin and easy to care for, making it a favorite choice for both everyday and specialty items.

1.1 What is Minky Fabric?

Minky fabric is a luxurious, synthetic material known for its incredibly soft, plush texture. It is made from 100% polyester fibers, which give it a velvety feel and exceptional durability. This fabric is often used in baby products, blankets, and home decor due to its gentle, skin-friendly nature. Minky fabric is also lightweight and easy to work with, making it a favorite among crafters and sewists. Its unique texture features small, raised dots or other patterns, adding to its visual appeal. Despite its delicate appearance, minky fabric is resilient and can withstand regular use, provided it is cared for properly. Its popularity stems from its comfort, versatility, and the elegant touch it brings to various projects.

1.2 Special Features of Minky Fabric

Minky fabric boasts several unique features that set it apart from other materials. Its plush pile gives it a soft, luxurious feel, while its synthetic polyester construction ensures durability and resistance to wrinkles. The fabric is lightweight, making it ideal for baby blankets and garments. Minky fabric is also breathable, allowing for airflow and comfort against the skin. It comes in a variety of colors and patterns, including dotted and textured designs, which add visual interest. Additionally, minky fabric is easy to care for, as it can be machine washed and dried, though it requires specific care to maintain its texture. Its versatility makes it a popular choice for sewing projects, from home decor to apparel, while its gentle texture ensures it remains a favorite for baby and sensitive-skin applications.

General Washing Instructions

Machine wash minky fabric in cold water on a delicate cycle to preserve its softness and texture. Avoid using fabric softeners, as they can damage the plush fibers. Always wash separately to prevent friction and potential pilling, ensuring the fabric remains intact and maintains its luxurious feel. Gently remove and reshape while damp to retain its original shape and appearance.

2.1 Recommended Washing Method

For optimal care, machine wash minky fabric in cold water using a delicate or gentle cycle. Place the fabric in a mesh laundry bag to protect it from friction and potential damage. Use a mild, dye-free detergent to prevent discoloration and maintain softness. Avoid fabric softeners, as they can leave a residue that damages the plush fibers. Do not bleach or use harsh chemicals, as they can weaken the fabric. Gently reshape the fabric while it is still damp to maintain its original texture. Avoid overloading the washing machine, as this can cause unnecessary stress on the material. For best results, wash minky separately from other fabrics to prevent pilling or snagging. Following these steps ensures the fabric remains soft, vibrant, and intact after washing.

2.2 Water Temperature Guidelines

When washing minky fabric, it is essential to use cold water to preserve its softness and texture. Cold water prevents shrinkage, color fading, and damage to the plush fibers. Avoid using hot or warm water, as it can cause the fabric to lose its velvety feel and potentially lead to matting or pilling. If you must use warm water, ensure it is not exceeding 30°C (86°F), but cold water is always the safest option. Hot water can also weaken the fibers over time, reducing the fabric’s durability. Always check the care label for specific temperature recommendations, as some minky fabrics may have unique requirements. Using cold water is a simple yet effective way to maintain the quality and appearance of your minky fabric items.

2.3 Detergent Selection

When washing minky fabric, it is crucial to use a mild detergent that is free from harsh chemicals, bleach, or fabric softeners. Fabric softeners can leave a residue on the fabric, reducing its softness and causing it to feel stiff or sticky. Opt for a gentle, dye-free detergent to prevent color fading and damage to the plush fibers. Avoid using heavy-duty or abrasive detergents, as they can break down the fabric’s texture over time. For colored minky fabrics, a color-protecting detergent is recommended to maintain vibrancy. Additionally, avoid overloading the washing machine with too much detergent, as this can leave residue on the fabric. Always rinse the fabric thoroughly to ensure no detergent remains. Using the right detergent helps preserve the softness, texture, and appearance of minky fabric, ensuring it remains luxurious and comfortable for years to come.

2.4 Washing Minky with Other Fabrics

Washing minky fabric with other fabrics requires careful consideration to prevent damage and maintain its softness. It is generally recommended to wash minky items separately or with fabrics of similar texture to avoid snagging or abrasion. Placing minky fabric in a mesh laundry bag can provide extra protection during the wash cycle. Avoid washing minky with rough or heavy fabrics, as they may cause friction and lead to pilling or wear. Additionally, never use fabric softeners or bleach when washing minky with other fabrics, as these can damage the plush fibers. Opt for a gentle cycle with cold water to ensure the fabric remains intact. For mixed loads, choose fabrics that are equally delicate and avoid overloading the washing machine. Always check the care labels of other fabrics to ensure compatibility with minky’s washing requirements.

Drying and Ironing Tips

Air drying is recommended to preserve minky fabric’s softness. If using a dryer, select a low-heat setting. Avoid ironing, but if necessary, use a cool setting without steam to prevent damage.

3.1 Air Drying vs. Machine Drying

Air drying is the recommended method for minky fabric to preserve its softness and prevent shrinkage. Machine drying can be used on a low-heat setting, but high heat may damage the fabric. Air drying maintains the fabric’s plush texture and prevents pilling. Machine drying is faster but requires caution to avoid overheating. Always remove minky fabric while still slightly damp to prevent wrinkles. Avoid fabric softeners, as they can leave a residue. For best results, air drying is preferred, while machine drying should be done delicately. Proper drying ensures the fabric remains soft and luxurious for years to come.

3.2 Dryer Settings and Precautions

When machine drying minky fabric, use a low-heat or no-heat setting to prevent damage. High heat can cause shrinkage, pilling, or loss of softness. Remove the fabric while still slightly damp to avoid wrinkles and lay it flat to air dry completely. Do not overload the dryer, as this can stretch or damage the fabric. Use a clean dryer to prevent lint or debris from transferring to the minky. Avoid using fabric softeners, as they can leave a residue and reduce the fabric’s softness. If you prefer machine drying, ensure the dryer is set to a delicate or tumble-dry low option. Always check the fabric for any signs of damage before putting it back in the dryer. Proper drying settings and precautions are essential to maintain the quality and texture of minky fabric.

3.3 Ironing Minky Fabric

Ironing minky fabric requires careful attention to avoid damaging its plush texture. Use a low-temperature setting on your iron and place a pressing cloth, like a clean cotton fabric, between the iron and minky to protect it from direct heat. Avoid using steam, as it can cause the fabric to shrink or lose its softness. Iron on the reverse side if possible, and never leave the iron stationary for too long to prevent scorching. For stubborn wrinkles, gently stretch the fabric while ironing. Ironing is best done before sewing or after washing, but avoid ironing minky fabric unnecessarily. Always test a small, inconspicuous area first to ensure the heat won’t damage the fabric. Proper ironing techniques help maintain the fabric’s appearance and extend its lifespan.

Special Care Instructions

Minky fabric requires gentle care to maintain softness. Wash in cold water with mild detergent, avoid fabric softeners, and air dry. Use a mesh bag to prevent shrinkage and store properly.

4.1 Pre-Wash Treatment

Pre-washing minky fabric is essential to ensure optimal softness and prevent shrinkage. Before sewing or using, gently hand rinse or machine wash on a delicate cycle with cold water. This step removes any manufacturing residue and allows the fabric to relax, reducing the risk of shrinkage during future washes. Avoid using fabric softeners or harsh detergents, as they can damage the plush fibers. Instead, opt for a mild, dye-free detergent to maintain the fabric’s texture. After pre-washing, remove excess water without wringing, and lay flat to air dry. This process ensures the minky fabric remains soft and ready for your project or use.

4.2 Handling Shrinkage

Minky fabric, like many synthetic materials, can experience shrinkage if not properly cared for. To minimize shrinkage, always wash in cold water and avoid high heat settings in both washing and drying. Heat is the primary cause of shrinkage, as it can cause the fibers to contract and tighten. If shrinkage does occur, gently reshape the fabric while it is still damp to restore its original dimensions. Air drying is highly recommended, as machine drying on heat can exacerbate shrinkage. For items that must be dried in a machine, use a low-heat or air-fluff setting and remove the fabric as soon as the cycle ends. Proper handling and storage can also prevent shrinkage, ensuring your minky fabric remains soft and intact for years to come.

4;3 Using a Mesh Laundry Bag

Using a mesh laundry bag is a highly recommended step when washing minky fabric to protect it from damage. Place the minky item inside the bag before washing to prevent snagging and friction during the wash cycle. The mesh material allows water and detergent to flow through while keeping the fabric safe. This is especially important for delicate or intricately designed minky items. Ensure the bag is not overcrowded to allow proper movement of the fabric. Wash on a gentle cycle with cold water and a mild detergent. After washing, remove the fabric from the bag and proceed with air drying or low-heat drying. Using a mesh laundry bag helps preserve the softness and texture of minky fabric, ensuring it remains plush and intact for years to come.

4;4 Storing Minky Fabric

Proper storage of minky fabric is essential to maintain its softness and texture. Store minky fabric in a cool, dry place away from direct sunlight to prevent fading. Fold the fabric neatly and avoid hanging it, as this can cause stretching or distortion. Use a breathable storage bag or wrap the fabric in tissue paper to keep it clean and protected. Avoid storing minky in plastic bags, as this can trap moisture and lead to mildew. If storing for an extended period, ensure the fabric is completely dry and free of wrinkles. For added protection, place a sheet of acid-free tissue paper between layers to prevent friction. By following these storage tips, you can preserve the quality and plush feel of your minky fabric for years to come.

Common Mistakes to Avoid

Common mistakes include using fabric softeners, high heat settings, and harsh detergents, which can damage minky fabric’s softness and texture. Avoid ironing and ensure gentle care to preserve its quality.

5.1 Using Fabric Softeners

Using fabric softeners on minky fabric is highly discouraged, as they leave a residue that can dull the fabric’s softness and texture. Over time, this residue can weigh down the plush fibers, reducing their loft and making the fabric feel less luxurious. Additionally, fabric softeners can attract dirt and dust, leading to faster soiling and potential stains. The residue can also make the fabric less breathable, which is particularly problematic for items like blankets or clothing that require airflow. Instead of fabric softeners, consider using vinegar during the wash cycle to maintain softness naturally. This gentle alternative helps preserve the fabric’s integrity without compromising its signature plush feel. Avoiding fabric softeners ensures your minky fabric remains soft, clean, and vibrant for years to come.

5.2 High Heat Settings

Using high heat settings when washing or drying minky fabric can cause significant damage. Heat can shrink the fabric, ruining its texture and appearance. Prolonged exposure to high temperatures may also lead to discoloration, especially in vibrant or dark colors. The plush fibers of minky fabric are sensitive to heat, and excessive warmth can flatten them, losing their signature softness and loft. This irreversible damage can make the fabric feel rough and less appealing. To preserve the quality of your minky items, it’s crucial to avoid high heat entirely. Instead, opt for cold water washing and low-heat or air drying to maintain the fabric’s integrity. High heat settings are a common mistake that can quickly degrade minky fabric, so always choose gentle care methods to keep it looking and feeling its best.

5.3 Harsh Detergents

Using harsh detergents on minky fabric can damage its soft, plush texture and lead to long-term degradation. These detergents often contain strong chemicals that can strip the fabric of its natural oils, causing it to become stiff, brittle, or even discolored. Additionally, harsh detergents can leave behind residues that may irritate sensitive skin, especially for babies or individuals with skin allergies. To preserve the fabric’s integrity, it’s essential to use mild, dye-free detergents specifically designed for delicate or synthetic fibers. Avoiding fabric softeners is also crucial, as they can coat the fibers and reduce their softness over time. By choosing gentle cleaning products, you can maintain the luxurious feel and appearance of your minky fabric for years to come. Harsh detergents are a common mistake that can permanently harm minky fabric, so always opt for gentle care products.

Product-Specific Instructions

Always check the care label for specific washing instructions, as different brands like Minky Couture may have unique requirements. Use a mesh laundry bag for added protection during washing.

6.1 Minky Couture Wash Instructions

Minky Couture fabrics require gentle care to maintain their luxurious feel. Wash items in cold water using a mild detergent, avoiding fabric softeners or bleach. Place the fabric in a mesh laundry bag to protect it during the cycle. Gently swish the fabric in the water by hand or use a delicate machine setting. Do not wring or twist the fabric, as this can damage the plush fibers. After washing, remove excess water without wringing, and air dry away from direct sunlight. If using a dryer, set it to a low heat or air-fluff setting. Avoid ironing Minky Couture fabrics, as high heat can damage the material. For best results, follow these steps to preserve the softness and texture of your Minky Couture products.

6.2 Other Brand Considerations

While Minky Couture has specific care guidelines, other brands may vary slightly in their recommendations. Always check the care label provided by the manufacturer, as some brands may require hand washing or specific detergents. For example, certain brands advise against machine washing altogether, while others permit it on a delicate cycle. Some brands recommend pre-treating stains with mild detergents before washing, while others suggest avoiding fabric softeners to maintain the fabric’s plush texture. Additionally, certain brands may recommend low heat for drying or air drying to prevent shrinkage. It’s essential to follow the specific instructions provided by the brand to ensure the longevity and softness of the fabric. Using a mesh laundry bag can also help protect the fabric during the washing process, regardless of the brand.

6.3 Checking Care Labels

Always begin by examining the care label on your Minky fabric item, as it provides specific guidance tailored to the product. These labels outline the manufacturer’s recommendations for washing, drying, and ironing. Common symbols include a tub for washing, a square for drying, and an iron icon. Look for details such as water temperature (often cold or warm), cycle settings (delicate or gentle), and drying methods (air dry or low heat). Some labels may advise against certain practices, like fabric softeners or bleach. Ignoring these instructions can damage the fabric or reduce its softness. For items without labels, default to gentle care practices, such as cold water washing and low-heat drying. Checking care labels ensures you maintain the fabric’s quality and longevity.

Proper care ensures Minky fabric remains soft and luxurious. Wash in cold water, avoid fabric softeners, and opt for gentle cycles or air drying to preserve its quality and texture.

7.1 Key Takeaways

Washing Minky fabric requires careful attention to preserve its softness and texture. Always use cold water and a mild detergent, avoiding fabric softeners and harsh chemicals. Gently wash Minky items separately or in a mesh laundry bag to prevent friction and pilling. Avoid high heat in both washing and drying, as it can damage the fabric. Opt for air drying or tumble dry on a low setting to maintain the plush texture. Never iron Minky fabric, as it can melt or distort the fibers. Proper care ensures the fabric remains luxurious and durable. By following these guidelines, you can enjoy your Minky items for years while keeping them soft and vibrant. Regular maintenance and storage in a cool, dry place also help preserve its quality. Remember, gentle handling is key to maintaining the integrity of Minky fabric.

7.2 Final Thoughts

Proper care is essential to maintain the softness and longevity of Minky fabric. By following the guidelines outlined, you can ensure your Minky items remain vibrant and plush. Always opt for cold water, mild detergents, and gentle washing cycles. Avoid fabric softeners and high heat, which can damage the fabric. Air drying or using low heat settings in the dryer is recommended to preserve the texture. Regular maintenance and proper storage will also help keep your Minky fabric in excellent condition. Remember, taking the time to care for your Minky items will extend their lifespan and maintain their luxurious feel. With these simple steps, you can enjoy your Minky fabric for years to come. Proper care not only protects the fabric but also ensures it remains a cozy and comfortable choice for any project or use.

zoom whitening post op instructions pdf

Zoom Whitening is a professional teeth-whitening procedure that uses advanced light technology to remove stains and brighten teeth. It is known for its fast, safe, and effective results, offering a radiant smile in just one session. Post-operative care is crucial to maintain the outcomes, including adhering to dietary restrictions and proper oral hygiene practices. This guide provides detailed instructions to help you achieve and preserve your whitening results.

1.1 What is Zoom Whitening?

Zoom Whitening is a professional teeth-whitening treatment that combines a hydrogen peroxide-based gel with an advanced LED light. This system is designed to safely and effectively remove surface and deep stains from teeth, resulting in a brighter smile. The procedure is typically performed in a dental office and is known for its rapid results, often achieving noticeable whitening in just one session. Zoom Whitening is a popular choice for those seeking a fast, reliable, and long-lasting solution to enhance their smile. The treatment is tailored to individual needs and is monitored by a dentist for optimal safety and effectiveness.

1.2 Benefits of Zoom Whitening

Zoom Whitening offers numerous benefits, including fast, noticeable results, often in a single session. The treatment is safe and controlled, ensuring minimal discomfort. It effectively removes both surface and deep stains, providing a more radiant smile. The procedure is customized to individual tooth shade preferences, making it highly personalized. Additionally, Zoom Whitening is a non-invasive method with long-lasting results when proper post-operative care is followed. It boosts confidence and enhances overall dental aesthetics, making it a popular choice for those seeking a quick and effective smile transformation. The treatment is also monitored by dental professionals for optimal outcomes.

1.3 Importance of Post-Operative Care

Proper post-operative care is essential to maximize and maintain Zoom Whitening results. immediately after treatment, teeth are more susceptible to stains due to the temporary removal of the protective pellicle layer. Adhering to the recommended diet and oral hygiene practices helps prevent discoloration and ensures long-lasting outcomes. Ignoring post-care instructions can lead to reduced effectiveness or complications like sensitivity. By following guidelines, patients can preserve their bright smile and protect their investment in the procedure. Consistent care also supports overall dental health, ensuring a radiant and healthy smile for years to come.

Immediate Post-Whitening Instructions

The first 48 hours are crucial for optimal results. Avoid staining foods, drinks, and tobacco. Color spotting may occur due to temporary tooth dehydration. Follow guidelines carefully.

2.1 The First 24 Hours

The first 24 hours after Zoom Whitening are critical for achieving the best results. Avoid consuming staining foods and drinks, such as coffee, tea, or red wine, as teeth are more susceptible to stains. Use a soft-bristle toothbrush and gentle toothpaste to clean your teeth without causing irritation. If sensitivity occurs, apply desensitizing products as directed. Refrain from smoking or using tobacco products, as they can discolor your teeth. Stay hydrated to help flush out any remaining whitening agents. Avoid chewing ice or hard objects that could damage your teeth. Follow your dentist’s advice closely to ensure optimal outcomes.

2.2 The Next 48 Hours

During the next 48 hours, continue to avoid staining foods and drinks, such as coffee, tea, and berries, to protect your whitening results. Stick to a “White Diet” consisting of foods like rice, chicken, and white fish. Avoid smoking or using tobacco products, as they can cause discoloration. Use a soft-bristle toothbrush and fluoride toothpaste to maintain oral hygiene. If sensitivity persists, apply desensitizing gel as recommended. Stay hydrated to help maintain enamel health. Avoid chewing on hard objects or ice, which could damage your teeth. Touch-up treatments can be used after 48 hours to enhance results.

2.3 Understanding Tooth Sensitivity

Tooth sensitivity after Zoom Whitening is common and temporary, often occurring due to dehydration of the enamel and exposure of dentinal tubules. Symptoms include sharp pains when consuming hot, cold, or sweet items. To alleviate discomfort, use desensitizing toothpaste or apply relief gel as directed. Avoid consuming extreme temperatures of food or drink. Sensitivity typically subsides within a few days. If it persists or worsens, contact your dentist for further assistance. Proper post-operative care can help minimize sensitivity and ensure long-lasting results.

Dietary Recommendations

Adhering to a white diet for the first 48 hours after Zoom Whitening is essential to maintain results. Avoid staining foods like coffee, tea, and berries, and opt for white or light-colored foods and drinks to prevent discoloration. This includes choosing white meats, fish, dairy products, and bland snacks. Proper dietary choices support long-term whitening effectiveness and protect your investment in a brighter smile.

3.1 The White Diet: What to Avoid

After Zoom Whitening, adhering to the white diet is crucial for the first 48 hours. Avoid dark-colored foods and drinks, such as coffee, tea, red wine, berries, and soy sauce, as they can stain your teeth. Refrain from consuming brightly colored or acidic foods, including tomatoes and citrus fruits. Additionally, avoid smoking and chewing tobacco, as these can discolor your teeth. By avoiding these items, you protect your investment and ensure the best possible results from your whitening treatment. This dietary discipline helps maintain your bright, white smile for a longer period.

3.2 Recommended Foods and Drinks

During the post-whitening period, focus on consuming white or light-colored foods and drinks to prevent staining. Opt for white meats like chicken or turkey, fish, and eggs; Dairy products such as milk, cheese, and yogurt are also safe choices. Vegetables like cauliflower, potatoes, and green beans are recommended. For snacks, consider rice cakes, white bread, or bananas. Clear beverages such as water, herbal teas without color, and white juices are ideal. Avoid anything that could leave a residue or color on your teeth. This cautious approach helps maintain the brightness of your smile and ensures long-lasting results.

3.3 Maintaining a Balanced Diet

A balanced diet is essential for overall health and supports your whitening results. Incorporate a variety of nutrient-rich foods, including fruits, vegetables, lean proteins, and whole grains. While avoiding stain-causing foods is crucial, you can still enjoy a diverse diet by choosing light-colored options. Stay hydrated with water to help rinse your mouth naturally. Moderation is key, even with recommended foods, to ensure long-term oral health and a vibrant smile. By combining proper dietary habits with good oral hygiene, you can maintain both your whitening results and overall well-being effectively. A balanced approach ensures sustainability and satisfaction.

Oral Hygiene Practices

Proper oral hygiene is vital for maintaining your whitening results. Brush twice daily with a fluoride toothpaste and floss regularly to remove plaque and prevent stains. Using a Sonicare toothbrush can help keep your teeth clean and bright, while avoiding stain-causing foods supports long-term results. Consistent care ensures a healthy, radiant smile.

4.1 Brushing Techniques

Proper brushing techniques are essential for maintaining your Zoom Whitening results. Use a soft-bristled toothbrush or a Sonicare toothbrush to gently clean your teeth twice daily. Apply fluoride toothpaste and brush in gentle circular motions, focusing on the areas where the teeth and gums meet. Avoid using abrasive products or hard-bristled brushes, as they can damage the enamel and reduce the whitening effects. Regular brushing helps prevent new stains and ensures your smile remains bright and healthy. Consistency is key to preserving the outcome of your Zoom Whitening treatment.

4.2 Flossing and Interdental Care

Flossing is a crucial part of maintaining your Zoom Whitening results. Gently floss once daily to remove plaque and food particles between teeth, where a toothbrush cannot reach. Use a soft, waxed floss to avoid damaging your gums or tooth enamel. For tight spaces, consider using interdental brushes or floss picks. Avoid using abrasive products or flossing too aggressively, as this can irritate the gums or scratch the teeth. Regular flossing helps prevent new stains and ensures your smile stays bright and healthy. Proper interdental care complements brushing and supports long-term whitening results.

4.4 Using a Sonicare Toothbrush

A Sonicare toothbrush is highly recommended to maintain your Zoom Whitening results. Its gentle yet effective vibrations help remove surface stains and plaque without damaging your teeth or gums. Use it twice daily with a soft-bristle head and a non-abrasive toothpaste. Avoid applying too much pressure, as this could cause sensitivity. The Sonicare’s design ensures thorough cleaning, especially in hard-to-reach areas, helping to preserve your bright smile. Regular use complements your post-whitening care routine and prevents new stains from forming. For optimal results, replace the brush head every 3 months and keep the device fully charged.

5.1 Causes of Sensitivity

Tooth sensitivity after Zoom Whitening is often temporary and occurs due to the dehydration of the enamel during the procedure. The hydrogen peroxide-based whitening gel can penetrate the tooth enamel and reach the dentin, irritating the nerve. Sensitivity may also be caused by the removal of the protective pellicle layer, which exposes the tooth surface. Factors like gum recession or cracked teeth can exacerbate sensitivity. It is important to follow post-operative instructions, such as avoiding extreme temperatures and using desensitizing products, to minimize discomfort. Sensitivity typically subsides within a few days as the teeth rehydrate naturally.

5;2 Relief Measures

To alleviate tooth sensitivity after Zoom Whitening, apply a desensitizing gel like Relief ACP directly to the affected areas using the provided trays. This gel helps block nerve endings and remineralize the enamel. Avoid consuming hot or cold foods and drinks for 24-48 hours. Brushing with a fluoride toothpaste can also reduce sensitivity. If discomfort persists, consider using over-the-counter desensitizing toothpaste or rinses. Following these measures ensures comfort while maintaining your whitening results. Always consult your dentist if sensitivity becomes severe or prolonged. Proper care can prevent further issues and preserve your smile’s health.

5.3 When to Seek Professional Help

If tooth sensitivity persists beyond a few days or becomes severe, consult your dentist. Additionally, seek professional help if you notice uneven whitening, color spotting, or significant pain. Your dentist can assess the situation and provide tailored solutions, such as adjusting the treatment or recommending additional care. Persistent issues may require further evaluation to ensure optimal results and prevent complications; Timely intervention ensures your smile remains healthy and vibrant, addressing any concerns effectively. Always prioritize professional advice for unresolved post-whitening issues.

Maintaining Your Whitening Results

To preserve your bright smile, schedule regular touch-ups and use at-home whitening products like Zoom NiteWhite or DayWhite gels. Maintain good oral hygiene with Sonicare toothbrushes and avoid stain-causing foods to prevent discoloration. Regular professional cleanings are essential for long-lasting results.

6.1 Touch-Up Treatments

Touch-up treatments are essential for maintaining your Zoom Whitening results. These treatments can be done at home using Zoom’s NiteWhite or DayWhite gels in custom trays. We recommend applying a small amount of gel to the trays and wearing them for a few hours or overnight, as directed. For optimal results, touch-ups should be done every 3-6 months or when you notice a slight fading of the whiteness. Always follow the instructions provided with the gel to ensure effectiveness and avoid overuse. Regular touch-ups will help keep your smile bright and radiant.

6.2 At-Home Whitening Options

For sustained results, Zoom offers convenient at-home whitening options. The NiteWhite and DayWhite gels are designed for use with custom trays, allowing you to maintain your smile’s brightness. Apply a small amount of gel to the trays and wear them for the recommended duration, typically a few hours or overnight. These products are gentle yet effective, helping to remove surface stains and prevent discoloration. Always follow the instructions provided to avoid overuse and ensure optimal results. Regular use of these at-home systems will help preserve your Zoom Whitening outcomes and keep your teeth looking their best.

6.3 Frequency of Professional Cleanings

Regular professional cleanings are essential to maintain your Zoom Whitening results. It is recommended to schedule dental cleanings every six months to remove plaque and surface stains, ensuring your teeth remain bright and healthy. These cleanings also help prevent the reaccumulation of stains and maintain the overall effectiveness of your whitening treatment. By combining professional care with at-home maintenance, you can enjoy a long-lasting, radiant smile. Consistency is key to preserving the investment you’ve made in your teeth’s appearance and health.

Avoiding Common Mistakes

Avoid overusing whitening products, as this can cause sensitivity or damage. Stick to recommended guidelines and avoid staining foods/drinks to preserve results. Proper care ensures longevity.

7.1 Overusing Whitening Products

Overusing whitening products can harm your teeth and gums, causing sensitivity and erosion; Always follow the recommended usage guidelines provided by your dentist. Using too much gel or applying it too frequently can damage enamel and prolong sensitivity. Stick to the prescribed routine to avoid complications and ensure optimal results. Proper adherence prevents overexposure to bleaching agents, safeguarding your dental health. Remember, consistency is key, not frequency.

7.2 Ignoring Dietary Advice

Ignoring dietary advice after Zoom Whitening can lead to staining and reduced results. Consuming staining foods and drinks, such as coffee, tea, or red wine, too soon can compromise your smile. The protective pellicle layer on teeth is temporarily removed during whitening, making them more vulnerable to stains. Stick to the recommended White Diet for at least 48 hours post-treatment to ensure long-lasting results. Avoid dark-colored foods and beverages, as they can seep into tooth surfaces and dull your smile. Following dietary guidelines is crucial for maintaining the brightness and effectiveness of your Zoom Whitening treatment.

7.3 Poor Oral Hygiene Practices

Poor oral hygiene after Zoom Whitening can hinder results and lead to staining or sensitivity. Neglecting to brush and floss regularly allows plaque and stains to accumulate, dulling your smile. Use a soft-bristle toothbrush and fluoride toothpaste to clean teeth gently, especially after meals. Incorporate a Sonicare toothbrush for effective plaque removal. Avoiding proper hygiene practices can also cause uneven whitening and prolong sensitivity. Maintain consistent oral care to preserve your bright, white smile and prevent future stains. Regular brushing and flossing are essential for long-term results and overall dental health.

Troubleshooting Common Issues

Common issues after Zoom Whitening include tooth sensitivity, color spotting, or uneven results. Addressing these promptly ensures optimal outcomes and maintains your bright smile.

8.1 Color Spotting on Teeth

Color spotting on teeth can occur after Zoom Whitening due to temporary dehydration. This is usually harmless and fades within 24-48 hours. To minimize spotting, avoid staining foods and drinks, and maintain good oral hygiene. Using a Sonicare toothbrush and desensitizing toothpaste can help. If spots persist, contact your dentist for further advice. Proper post-operative care ensures a bright, even smile.

8.2 Prolonged Sensitivity

Prolonged sensitivity after Zoom Whitening can occur due to the penetration of the whitening gel into the enamel and dentin. This is usually temporary but may last longer in some cases. To alleviate discomfort, use a desensitizing toothpaste containing potassium nitrate or apply a relief gel provided by your dentist. Avoid consuming hot or cold foods and drinks until sensitivity subsides. If sensitivity persists beyond a few days, consult your dentist for further evaluation and treatment options to ensure your comfort and the success of the whitening procedure. Proper care can help minimize prolonged sensitivity effectively.

8.3 Uneven Whitening Results

Uneven whitening results can occur due to various factors, such as inconsistent gel application or natural variations in tooth enamel. To address this, follow the post-op instructions carefully, including using the take-home whitening trays as directed. Attend scheduled touch-up appointments to ensure even results. Proper oral hygiene and avoiding stain-causing foods can also help maintain uniformity. If persistent unevenness is noted, consult your dentist for additional treatments or adjustments. Consistency and adherence to post-care routines are key to achieving a balanced, bright smile. Regular follow-ups can help refine and maintain your whitening outcomes effectively.

Long-Term Care and Maintenance

For lasting results, schedule annual whitening touch-ups and use whitening toothpaste. Regular dental cleanings and avoiding stain-causing foods help maintain your bright smile over time effectively.

9.1 Annual Whitening Touch-Ups

Annual whitening touch-ups are essential to maintain your bright smile. These short procedures refresh your teeth’s color and address any new stains. Using Zoom’s at-home products between touch-ups helps sustain results. Regular cleanings and check-ups with your dentist are also recommended to ensure optimal whitening outcomes. By committing to annual touch-ups, you can enjoy a consistently radiant smile and prevent discoloration over time. This proactive approach complements your initial Zoom treatment, ensuring long-term satisfaction with your teeth’s appearance.

9.2 Using Whitening Toothpaste

Whitening toothpaste is a gentle and effective way to maintain your Zoom Whitening results. These toothpastes are designed to remove surface stains and prevent discoloration. When used regularly, they help sustain the brightness of your teeth. Look for products containing mild abrasives and hydrogen peroxide, such as Zoom NiteWhite or DayWhite toothpaste. Use them as part of your daily oral hygiene routine, but avoid overuse, as it may cause sensitivity. Always follow your dentist’s recommendations to ensure safe and effective maintenance of your whitened smile. Consistency is key to preserving your radiant results.

9.3 Avoiding Stain-Causing Foods

To maintain your Zoom Whitening results, it’s essential to avoid foods and drinks that can stain your teeth. Coffee, tea, red wine, and dark berries are common culprits. These items contain chromogens, which can penetrate tooth enamel and discolor your smile. Additionally, acidic foods like tomatoes and citrus can weaken enamel, making teeth more susceptible to stains. By limiting these items and practicing good oral hygiene, you can preserve the brightness of your teeth. Using a straw for beverages can also help reduce contact with your teeth, further protecting your results. Consistency in these habits ensures a longer-lasting, vibrant smile.

Additional Resources

For further guidance, download our Zoom Whitening Post-Op Instructions PDF. Explore online forums for support and tips. Contact your dentist for personalized advice or concerns.

10.1 Downloadable PDF Guides

Our comprehensive Zoom Whitening Post-Op Instructions PDF provides detailed care tips, including dietary advice, oral hygiene practices, and troubleshooting common issues. It outlines the essential steps to maintain your whitening results, such as avoiding stain-causing foods and using recommended products. The guide also includes information on managing sensitivity and when to seek professional help. Download this resource to ensure you have all the information needed for optimal post-whitening care. This PDF is designed to be user-friendly, offering clear instructions and helpful insights to keep your smile bright and healthy.

10.2 Online Support and Forums

For additional guidance, visit our online support forums dedicated to Zoom Whitening. These platforms offer a space to ask questions, share experiences, and receive tips from experts and other patients. You can access 24/7 resources, including real-time advice from dental professionals. Many websites also provide step-by-step guides and troubleshooting tips to address common concerns. Joining these forums can help you stay informed and connected, ensuring you maximize your whitening results. They also offer updates on the latest post-operative care practices and product recommendations. Engage with the community to maintain your bright, healthy smile.

10.3 Contacting Your Dentist

If you have questions or concerns after your Zoom Whitening treatment, contacting your dentist is essential. They can provide personalized advice and address any issues, such as sensitivity or uneven results. Your dentist is a valuable resource for troubleshooting and ensuring optimal outcomes. Keep their contact information handy and don’t hesitate to reach out if you notice anything unusual. Regular follow-ups can also help maintain your results and prevent minor issues from becoming major problems. Your dentist is committed to helping you achieve and preserve a bright, healthy smile.

instructional assistant description

An instructional assistant supports teachers and students, preparing materials, managing classrooms, and performing clerical tasks. They collaborate with educators, use educational technology, and require strong communication and organizational skills.

Role Overview

An instructional assistant plays a vital role in education by supporting teachers, assisting students, and managing classroom activities. They ensure learning environments are productive and inclusive for all students.

Definition of an Instructional Assistant

An instructional assistant, also known as a teaching assistant or educational assistant, is an individual who supports teachers in delivering instruction and managing the classroom. Their role involves assisting students with academic tasks, preparing learning materials, and helping to maintain a structured and productive learning environment. Instructional assistants often work directly with students, providing individualized support and reinforcing lessons taught by the teacher. They play a crucial role in enhancing student learning and classroom efficiency, requiring strong communication and organizational skills to effectively collaborate with educators and students.

Importance of Instructional Assistants in Education

Instructional assistants play a vital role in enhancing the educational experience by supporting teachers and students. They enable teachers to focus on instruction by managing classroom tasks, preparing materials, and assisting students. Their presence allows for personalized attention to students, fostering academic growth and inclusivity. By maintaining a structured environment, instructional assistants contribute to improved learning outcomes and student success, making them indispensable in modern education systems.

Types of Instructional Assistants

Instructional assistants vary based on their roles and specializations. General instructional assistants support overall classroom activities, while special education assistants focus on students with special needs. English language learner assistants aid non-native speakers, and technical assistants specialize in subjects like STEM. Each type tailors their support to meet specific student and teacher needs, ensuring diverse educational requirements are effectively addressed.

Key Responsibilities

Instructional assistants support teachers by preparing materials, managing classrooms, and assisting students. They handle clerical tasks, communicate with parents, and help create engaging learning environments for students.

Academic Support for Students

Instructional assistants provide direct academic support by helping students understand concepts, completing assignments, and reinforcing lessons. They offer one-on-one or small-group guidance, adapt materials for diverse learners, and monitor progress to ensure students meet educational goals. This support fosters a productive learning environment and helps students build confidence and skills necessary for academic success.

Classroom Management and Organization

Instructional assistants play a key role in maintaining a well-organized and structured classroom environment. They help set up learning areas, distribute materials, and ensure resources are accessible. By monitoring student behavior and encouraging positive conduct, they support teachers in creating a respectful and focused atmosphere. Their organizational skills contribute to a smooth-running classroom, allowing teachers to concentrate on instruction and maximizing student learning efficiency.

Administrative and Clerical Duties

Instructional assistants handle various administrative tasks, such as preparing and copying educational materials, managing records, and maintaining classroom supplies. They assist with scheduling, filing, and organizing resources, ensuring smooth school operations. Clerical duties include updating records, handling correspondence, and supporting staff with administrative needs. Their attention to detail and organizational skills help maintain efficiency, allowing teachers to focus on instructional priorities and student development.

Communication with Teachers and Parents

Instructional assistants foster clear communication between teachers, parents, and students. They provide updates on student progress, participate in parent-teacher conferences, and share strategies to support learning at home. Effective communication ensures alignment between classroom activities and parental involvement, promoting a collaborative environment for student success. Regular updates and open dialogue help address student needs and strengthen the educational team’s efforts.

Required Skills and Qualifications

An instructional assistant typically requires a high school diploma, relevant certifications, and strong communication skills. Patience, organizational abilities, and basic technical proficiency are essential for success.

Education and Certification Requirements

An instructional assistant typically requires a high school diploma or equivalent. Many employers prefer or require postsecondary education or certifications, such as a paraeducator certificate. Some roles may demand an associate degree in education or a related field. Additional training in classroom management, special education, or bilingual support can be beneficial. Certifications often involve coursework or exams in areas like child development or educational assistance.

Interpersonal and Communication Skills

Strong interpersonal and communication skills are essential for instructional assistants to collaborate effectively with teachers, students, and parents. Active listening, empathy, and patience are crucial when working with diverse student needs. Clear and approachable communication fosters a positive learning environment, while building rapport with both students and educators enhances teamwork and support. These skills ensure effective coordination and problem-solving in dynamic classroom settings.

Technical and Organizational Skills

Instructional assistants must possess strong technical and organizational skills to manage classroom resources and support teaching activities. Proficiency in educational software, such as learning management systems, is essential for preparing digital materials and tracking student progress. Organizational skills ensure efficient preparation of lesson plans, materials, and records. Attention to detail and the ability to multitask are critical for maintaining classroom structure and supporting both teachers and students effectively.

Work Environment

Instructional assistants work in dynamic classroom settings, collaborating with teachers and staff to support student learning and engagement, while utilizing technology and resources effectively.

Classroom Setting and Dynamics

An instructional assistant operates in a vibrant classroom environment, collaborating with teachers to create engaging learning experiences. They interact closely with students, providing individualized support and fostering inclusive participation. The role involves preparing educational materials, organizing activities, and maintaining a structured yet dynamic setting that promotes student engagement and academic growth, ensuring a productive and interactive learning atmosphere for all pupils.

Collaboration with Teachers and Staff

Instructional assistants work closely with teachers and staff to support student learning and classroom operations. They attend meetings, share insights, and assist in planning activities. Collaborating effectively ensures a cohesive educational environment, fostering teamwork and communication to meet student needs and achieve academic goals. This partnership is essential for creating a structured and supportive setting that benefits both students and educators alike, enhancing overall educational outcomes.

Interaction with Students and Parents

Instructional assistants interact closely with students, offering academic and emotional support while monitoring progress. They also communicate with parents through meetings, updates, and reports, ensuring alignment on student development. Building trust and clear communication fosters a collaborative environment, benefiting both students and families. This role requires empathy, patience, and strong interpersonal skills to effectively engage with diverse stakeholders, promoting student success and parental involvement.

How to Become an Instructional Assistant

Pursue relevant education, obtain necessary certifications, and gain practical experience working with students and teachers to become an effective instructional assistant, supporting educational environments in schools.

Education and Training Pathways

Instructional assistants typically require a high school diploma or equivalent, with many pursuing post-secondary education in fields like education or child development. Certifications, such as paraeducator certifications, are often preferred. Professional development courses and on-the-job training are common, emphasizing classroom management, educational technology, and student support strategies. Some roles may require specialized training for working with students with special needs or English language learners.

Gaining Practical Experience

Gaining practical experience as an instructional assistant often involves volunteering or interning in schools. Many start by assisting teachers, observing classroom dynamics, and engaging in hands-on activities with students. This experience helps build skills in lesson preparation, classroom management, and student support. Working in diverse educational settings, such as special needs or bilingual classrooms, further enhances one’s ability to adapt and effectively contribute to student learning environments.

Obtaining Necessary Certifications

Obtaining necessary certifications is crucial for instructional assistants, often requiring training in areas like crisis intervention (CPI) or special education. Many employers mandate First Aid/CPR certification and background checks. Some states also require associate degrees or specific coursework. These certifications ensure assistants are equipped to handle classroom challenges and support diverse student needs effectively, enhancing job prospects and professional credibility in educational settings.

Tools and Resources

Instructional assistants utilize educational software, classroom technology, teaching aids, and organizational tools to support learning, manage tasks, and enhance student engagement effectively.

Technology and Software Used

Instructional assistants often use educational software, learning management systems, classroom management tools, and collaboration platforms. Tools like Google Classroom, Kahoot, and Grammarly support lesson delivery. They also utilize organizational apps such as Trello for task management. Additionally, assistive technologies like text-to-speech tools and interactive whiteboards enhance student engagement. These resources help streamline tasks, improve communication, and create an inclusive learning environment for all students.

Teaching Aids and Materials

Instructional assistants prepare and distribute educational materials, such as worksheets, posters, and visual aids, to support lesson plans. They organize teaching tools like manipulatives, educational games, and digital resources. These materials help engage students, simplify complex concepts, and cater to diverse learning styles. Assistants also ensure materials align with curriculum goals and are accessible to all learners, fostering an inclusive and effective learning environment.

Professional Development Opportunities

Instructional assistants can enhance their skills through workshops, online courses, and collaborative training with teachers. They gain expertise in educational technology, classroom management, and special needs support. Professional development fosters growth, enabling assistants to adapt to evolving educational strategies and improve student outcomes effectively. These opportunities ensure they stay updated on best practices and innovative teaching methods.

Challenges and Solutions

Instructional assistants face challenges like classroom management and balancing multiple responsibilities. Solutions include effective communication, time management, and seeking support from teachers and professional development resources.

Common Challenges Faced

Instructional assistants often encounter challenges such as managing diverse student needs, balancing multiple tasks, and maintaining classroom order. They may face difficulties in communicating effectively with parents and students, adapting to new technologies, and handling high workloads. Additionally, they must navigate complex classroom dynamics and ensure equitable support for all learners while maintaining professional boundaries and staying aligned with teacher expectations.

Strategies for Effective Support

Instructional assistants can enhance their support by building strong relationships with teachers and students, ensuring clear communication, and staying organized. They should adapt strategies to meet diverse learning needs, utilize educational technology effectively, and maintain a proactive approach to classroom management. Additionally, seeking professional development and collaborating with colleagues can improve their effectiveness in providing tailored support and fostering an inclusive learning environment.

Maintaining Professional Boundaries

Maintaining professional boundaries is crucial for instructional assistants to ensure respect, trust, and effective collaboration. This involves respecting the teacher’s authority, avoiding overstepping roles, and keeping personal relationships separate. Clear communication, confidentiality, and adhering to school policies are essential. Professional boundaries also include respecting students’ privacy and personal space, ensuring interactions remain appropriate and focused on educational goals.

Benefits of Being an Instructional Assistant

Being an instructional assistant offers personal growth, the fulfillment of impacting student learning, and job satisfaction, making it a rewarding career choice.

Personal and Professional Growth

As an instructional assistant, you gain valuable experience working with students and educators, enhancing your teaching and communication skills. This role fosters professional development, offering opportunities to learn new strategies and technologies. It also builds confidence and adaptability, preparing you for advanced roles in education. The collaborative environment encourages growth, helping you refine your abilities and expand your career prospects in the educational field.

Impact on Student Learning

Instructional assistants play a crucial role in enhancing student learning by providing personalized support and guidance. They help students grasp complex concepts, fostering academic success and confidence. By addressing individual needs and collaborating with teachers, assistants ensure tailored learning experiences. This targeted support often leads to improved understanding, engagement, and overall academic outcomes, making a lasting positive impact on students’ educational journeys and achievements.

Job Satisfaction and Fulfillment

Instructional assistants often find deep fulfillment in their roles by making a meaningful impact on students’ lives. Witnessing academic progress and personal growth in students brings immense satisfaction. The collaborative environment with teachers and the opportunity to contribute to education create a sense of purpose. This role offers emotional rewards, as assistants play a vital part in shaping young minds and fostering a supportive learning environment.

Career Path and Advancement

Instructional assistants can advance by pursuing higher education or certifications, leading to roles like senior assistants or teachers. Specializations and further training enhance career growth opportunities.

Opportunities for Career Growth

Instructional assistants can advance to senior roles, specializing in areas like special education or technology. With experience, they may transition into teaching positions or pursue leadership roles. Professional development and certifications expand career prospects, enabling them to take on mentorship or administrative responsibilities, fostering long-term growth in educational support and leadership.

Specializations and Areas of Focus

Instructional assistants can specialize in areas like special education, language support, or STEM subjects. Some focus on behavioral support, while others work with diverse learner groups. Specializations allow assistants to tailor their expertise, catering to specific student needs and enhancing classroom effectiveness. These focused roles enable deeper impacts on student learning and teacher collaboration, aligning with individual strengths and educational goals.

Pursuing Higher Education

Instructional assistants may pursue higher education to advance their careers, such as earning a Bachelor’s degree in education or specialized fields like special education. This pathway often leads to roles like certified teachers or educational administrators. Further education enhances their expertise, enabling them to take on leadership roles or specialize in areas like curriculum development or educational technology, contributing to lifelong professional growth and career advancement in education.

The role of an instructional assistant is vital in supporting educators and enhancing student learning experiences. By preparing materials, managing classrooms, and providing individualized support, they play a crucial part in fostering academic success. Their ability to adapt, communicate effectively, and work collaboratively ensures a positive learning environment. As education evolves, the contributions of instructional assistants remain essential in shaping the future of students and educational systems worldwide.

ge monogram oven cleaning instructions

Cleaning your GE Monogram Oven is essential for maintaining its performance and appearance․ Regular cleaning prevents grease buildup and ensures optimal cooking results․ This guide provides comprehensive instructions for effective cleaning, covering manual methods, self-cleaning features, and maintenance tips to keep your oven in prime condition․

1․1 Importance of Regular Cleaning

Regular cleaning of your GE Monogram Oven is crucial for maintaining its efficiency, safety, and longevity․ Grease and food residue can build up over time, leading to unpleasant odors, reduced performance, and even fire hazards․ A clean oven ensures consistent cooking results and prevents the spread of bacteria․ Additionally, regular maintenance enhances the oven’s appearance and prevents stubborn stains from forming․ Cleaning also helps maintain the oven’s warranty by adhering to manufacturer recommendations․

1․2 Overview of Cleaning Methods

Cleaning your GE Monogram Oven can be done through various methods to suit your needs․ The self-cleaning feature uses high heat to burn food residue, while steam cleaning offers a gentler approach․ Manual cleaning involves using oven cleaners or homemade solutions like baking soda and vinegar․ Regular wiping of spills and using the steam clean function can prevent heavy buildup․ Each method has its benefits, and choosing the right one ensures a clean, efficient, and safe oven․ Always follow manufacturer guidelines for best results․

Safety Precautions

Safety is crucial when cleaning your GE Monogram Oven․ Always turn off power, avoid hot surfaces, keep children and pets away, and ensure proper ventilation during cleaning․

2․1 Essential Safety Tips

When cleaning your GE Monogram Oven, prioritize safety to avoid accidents․ Always turn off the oven and let it cool completely before cleaning․ Keep children and pets away during the process․ Never touch hot surfaces, and ensure the area around the oven is clear of flammable materials․ Proper ventilation is crucial, especially during self-cleaning cycles, as fumes can be hazardous․ Avoid using abrasive cleaners or harsh chemicals that might damage surfaces or release harmful vapors․ Always follow manufacturer guidelines for a safe and effective cleaning experience․

2․2 Handling Hot Surfaces

When working with your GE Monogram Oven, always exercise caution with hot surfaces․ Use oven mitts or towels to protect your hands from burns․ Never touch the oven’s interior, racks, or exterior during or immediately after cooking or cleaning, as they can remain extremely hot․ Keep children and pets away from the oven when it is in use or cooling down․ Always allow the oven to cool completely before cleaning to ensure a safe and injury-free experience․

2․3 Ventilation Requirements

Proper ventilation is crucial when cleaning your GE Monogram Oven, especially during self-cleaning cycles․ Open windows or use an exhaust fan to remove fumes and odors․ The self-clean cycle releases carbon monoxide from insulation, so ensure good airflow to minimize exposure․ Avoid using strong chemicals, as they can release harmful vapors․ Keep the area well-ventilated to maintain a safe environment and prevent respiratory irritation․ This step ensures a safe and effective cleaning process for both you and your oven․

Preparation for Cleaning

Before cleaning your GE Monogram Oven, ensure it is cool, unplug it, and remove racks․ Clear the surrounding area to prevent fire hazards and accidental start-ups․

3․1 Turning Off the Oven

To ensure safety, turn off your GE Monogram Oven at the controls and confirm it is cool before cleaning․ Unplug the oven or switch off the circuit breaker for added safety․ Allow the oven to cool completely, as high temperatures can cause burns or damage․ Never start cleaning until the oven is at room temperature․ This step prevents accidents and ensures a safe cleaning process․ Always verify the oven’s temperature before proceeding with any cleaning tasks․

3․2 Removing Oven Racks

Before cleaning, remove the oven racks to ensure thorough access to the interior․ Use oven mitts or gloves to protect your hands from sharp edges․ Place racks in a soak solution or dishwasher for easy cleaning․ Avoid using abrasive cleaners or scrubbers, as they may damage the racks’ finish․ For tough food residue, let racks soak in warm water and mild detergent․ Always refer to your GE Monogram Oven manual for specific rack removal and cleaning instructions to maintain their quality and durability․

3․3 Clearing the Surrounding Area

Ensure the area around your GE Monogram Oven is clear of flammable materials and obstacles․ Move any nearby items, such as curtains or towels, to prevent fire hazards․ Cover countertops and floors with newspaper or a drop cloth to protect them from cleaning solutions․ Open windows for ventilation and avoid leaving children or pets nearby․ This preparation ensures a safe and efficient cleaning process, allowing you to focus on the oven without distractions or risks․

Manual Cleaning Methods

Manual cleaning involves removing racks and wiping the interior with a damp cloth or gentle cleaner․ Apply cleaning solutions to tough stains and let them soak before scrubbing․ Avoid harsh chemicals and abrasive tools to prevent damage․ Regular manual cleaning keeps your GE Monogram Oven in great condition and maintains its performance and appearance over time․

4․1 Interior Cleaning Solutions

For manual interior cleaning, mix baking soda and water to create a paste, applying it to tough stains․ Let it soak overnight before scrubbing gently with a soft cloth․ Avoid harsh chemicals, as they can damage the finish․ Instead, use a mild cleaning solution or white vinegar diluted with water․ Always rinse thoroughly and dry the interior to prevent water spots․ Regular cleaning maintains the oven’s appearance and ensures optimal performance․ Follow manufacturer recommendations for safe and effective results․

4․2 Exterior Cleaning Techniques

Clean the exterior of your GE Monogram Oven using a soft, damp cloth and a gentle cleaning solution to avoid scratching the surface․ For tougher stains, mix equal parts water and white vinegar on a microfiber cloth․ Gently wipe the exterior, paying attention to knobs and handles․ Avoid harsh chemicals or abrasive materials, as they can damage the finish․ For stainless steel surfaces, use a stainless steel cleaner and polish for a sleek appearance․ Regular exterior cleaning maintains the oven’s aesthetic appeal and prevents grime buildup․

4․3 Cleaning Oven Racks

Clean GE Monogram Oven Racks by removing them and washing with mild soap and warm water․ For tough stains, soak racks in soapy water or a vinegar solution․ Scrub gently with a non-abrasive sponge to avoid scratching․ For convenience, place racks in the dishwasher on a gentle cycle․ Dry thoroughly before reinstalling to prevent water spots․ Regular cleaning ensures racks remain in good condition and maintain optimal oven performance․ Avoid using harsh chemicals or abrasive cleaners to preserve the racks’ finish․

4․4 Door Gasket Maintenance

Regularly inspect and maintain the oven door gasket to ensure a proper seal, which is crucial for efficient cooking and safety․ Avoid cleaning the gasket, as this can damage the material․ Never use harsh chemicals or abrasive cleaners, as they may degrade the gasket․ Instead, wipe gently with a soft, dry cloth to remove surface dust․ If the gasket shows signs of wear or damage, replace it immediately to prevent heat from escaping and potential fire hazards․ A well-maintained gasket ensures optimal oven performance and longevity․

Using the Self-Cleaning Feature

The self-cleaning feature simplifies oven maintenance by locking in food residue and burning it to ash․ Always remove racks and wipe up excess spills before starting․ Ensure the oven is cool, then set the self-clean cycle․ Keep the area clear, and avoid opening the door during cleaning․ Ventilate the kitchen to prevent fumes․ This feature is efficient but requires careful preparation and safety precautions to ensure a safe and effective cleaning process․

5․1 Understanding the Self-Clean Cycle

The self-clean cycle uses high heat to reduce food residue to ash, making cleaning easier․ It is a hands-off process, but preparation is key․ Remove racks, wipe excess spills, and ensure the oven is cool before starting․ The cycle duration varies, typically 2-5 hours․ The oven door locks during cleaning for safety․ Ventilate your kitchen to manage fumes․ After the cycle, let the oven cool, then wipe away ash with a damp cloth․ This method is efficient but requires careful preparation and patience for optimal results․

5․2 Preparing for the Self-Clean Cycle

Before using the self-clean feature, ensure the oven is cool and empty․ Remove racks, shelves, and any utensils․ Wipe up large food debris with a damp cloth to prevent smoke․ Keep children and pets away․ Turn off the oven and allow it to cool completely․ Clear the surrounding area to avoid fire hazards․ Proper preparation ensures a safe and effective cleaning cycle, minimizing fumes and residue․

5․3 Activating the Self-Cleaning Mode

To activate the self-cleaning mode, press the SELF CLEAN button on the control panel․ Select the desired cleaning time using the number pads, typically 2-4 hours, depending on soil level․ Close the oven door firmly and press START․ The oven will automatically lock and begin the cycle․ Ensure the area is well-ventilated to prevent fumes․ Do not open the door during the cycle․ After completion, let the oven cool before wiping away ash with a damp cloth․ This process ensures a thorough cleaning without harsh chemicals․

5․4 Post-Cycle Cleaning Steps

After the self-cleaning cycle, allow the oven to cool completely before cleaning․ Wear gloves to protect your hands from sharp edges․ Wipe the interior with a damp cloth to remove ash and residue․ Avoid cleaning the door gasket, as it’s essential for sealing․ For tough spots, use a soft scrubber and mild soap․ Clean the racks separately with soap and warm water․ Finally, polish the exterior with an appliance cleaner to restore its shine․ Regular post-cycle maintenance ensures your oven remains efficient and looks like new․

Steam Cleaning Method

The steam cleaning method is a gentle, eco-friendly option for GE Monogram ovens․ Add water, run the steam cycle, and wipe away food residue․ Effective for light spills and grime, but may not tackle tough stains like burnt-on food․ Ideal for routine maintenance․

6․1 Benefits of Steam Cleaning

Steam cleaning is a gentle yet effective method for maintaining your GE Monogram Oven․ It uses water vapor to loosen food residue without harsh chemicals, making it eco-friendly and safer for surfaces․ This technique is ideal for light spills and grime, leaving the oven interior clean and fresh․ Steam cleaning is also energy-efficient and reduces strong odors․ However, it may not tackle tough, burnt-on stains, making it best for routine maintenance rather than deep cleaning tasks․ Regular steam cleaning helps preserve the oven’s finish and performance․

6․2 Steps to Use Steam Clean

To use the steam clean feature on your GE Monogram Oven, start by ensuring the oven is cool․ Add 1 cup of water to the oven floor or a steam clean pan․ Close the oven door and select the Steam Clean option from the control panel․ Set the timer according to the manufacturer’s instructions, typically 30 minutes․ Allow the cycle to run, as steam loosens food residue․ Once complete, wipe the interior with a damp cloth to remove grime․ This method is gentle and effective for light cleaning, avoiding harsh chemicals and maintaining your oven’s finish․

6․3 Natural Cleaning Solutions

For a chemical-free approach, use natural solutions to clean your GE Monogram Oven․ Mix equal parts water and white vinegar in a spray bottle․ Apply the solution to the interior surfaces and let it sit for 30 minutes to loosen grime․ For tougher stains, create a paste with baking soda and water, applying it directly to affected areas․ Allow it to sit overnight, then wipe clean with a damp cloth․ Lemon juice can also be used to remove stubborn stains naturally․ Always ensure the oven is cool before cleaning and avoid harsh chemicals to maintain the finish․

Cleaning Oven Doors and Windows

Regularly clean the oven doors and windows to maintain visibility and hygiene․ Use a gentle cleaner and a soft cloth to wipe away grime․ Avoid harsh chemicals to protect the surface finish and ensure a sparkling appearance․

7․1 Exterior Door Cleaning

Cleaning the exterior of your GE Monogram oven door is essential for maintaining its sleek appearance and hygiene․ Use a soft, damp cloth and a gentle cleaning solution to wipe away fingerprints, splatters, and grime․ Avoid harsh chemicals or abrasive cleaners, as they can damage the finish․ For tougher stains, mix a small amount of dish soap with warm water and apply gently․ Rinse thoroughly with a clean, damp cloth and dry with a towel to prevent streaks․ Regular cleaning prevents grime buildup and keeps the exterior looking pristine and polished․

7․2 Interior Window Cleaning

Cleaning the interior window of your GE Monogram oven ensures clear visibility during cooking․ Use a gentle glass cleaner or a mixture of equal parts water and white vinegar․ Apply the solution with a soft, lint-free cloth, avoiding abrasive materials that could scratch the glass․ Wipe in a circular motion, then dry thoroughly with a clean cloth to prevent streaks․ Avoid using harsh chemicals or high-pressure washes, as they may damage the glass or its protective coatings․ Regular cleaning maintains clarity and enhances the overall appearance of your oven․

7․3 Preventing Streaks and Residue

To prevent streaks and residue on your GE Monogram oven windows, use a microfiber cloth to wipe down surfaces after cleaning․ Avoid using paper towels, as they can leave lint․ For glass surfaces, apply a small amount of glass cleaner or a water-and-white-vinegar solution, then buff dry with a clean microfiber cloth․ Regularly cleaning and drying the windows prevents water spots and residue buildup, ensuring clear visibility․ Avoid using abrasive cleaners or scrubbers, as they may scratch the glass or leave streaks․

Deep Cleaning the Oven

Deep cleaning your GE Monogram oven is essential for removing stubborn grime and food residue․ Use a combination of gentle scrubbing and specialized cleaning solutions to restore its shine and efficiency․ Regular deep cleaning ensures optimal performance and prevents heavy buildup over time, keeping your oven in excellent condition for years to come․

8․1 When to Deep Clean

Deep cleaning your GE Monogram oven is necessary every 3 to 6 months or when visible grime and food residue accumulate․ If you notice heavy staining, persistent odors, or reduced performance, it’s time for a thorough cleaning․ Additionally, consider deep cleaning after major cooking projects or when preparing for special occasions to ensure your oven operates efficiently and maintains its appearance․

8․2 Effective Deep Cleaning Techniques

For deep cleaning, combine baking soda and water to create a paste, applying it to interior surfaces․ Let it sit overnight before wiping clean with a damp cloth․ Steam cleaning is also effective—place a bowl of water in the oven and heat it to create steam, loosening grime․ Avoid harsh chemicals to prevent damage․ Scrub tough stains gently with a non-abrasive sponge․ After cleaning, dry surfaces thoroughly to prevent water spots and maintain your oven’s polished finish․

8․3 Removing Tough Stains

For stubborn stains, apply a paste made from baking soda and water directly to the affected areas․ Let it sit overnight, then wipe clean with a damp cloth․ For particularly tough spots, use the oven’s self-cleaning feature to reduce stains to ash, which can be easily wiped away․ Avoid harsh chemicals or abrasive cleaners, as they may damage surfaces․ For natural cleaning, vinegar can be used to soak stains before gentle scrubbing with a non-abrasive sponge․ Always dry surfaces thoroughly after cleaning to prevent streaks․

Post-Cleaning Care Tips

After cleaning, polish the exterior with a microfiber cloth and gentle appliance polish․ Avoid harsh chemicals and dry surfaces thoroughly to prevent streaks․ Wipe racks and check for residue regularly to maintain your oven’s pristine condition․

9․1 Polishing the Exterior

Polishing the exterior of your GE Monogram Oven enhances its appearance and protects the surface․ Use a soft, microfiber cloth and a gentle appliance polish to buff away fingerprints and smudges․ Avoid abrasive cleaners or scrubbers, as they may damage the finish․ Apply the polish evenly, working in circular motions․ Buff thoroughly to achieve a streak-free shine․ Regular polishing helps maintain the oven’s sleek look and prevents grime buildup․ For tougher spots, dampen the cloth slightly but avoid excessive moisture, which could harm electrical components․ This step ensures your oven remains both functional and visually appealing․

9․2 Avoiding Harsh Chemicals

Avoid using harsh chemicals when cleaning your GE Monogram Oven to prevent damage to the finish or internal components․ Abrasive cleaners, bleach, or ammonia can strip away protective coatings or discolor surfaces․ Instead, opt for gentle cleaning solutions like vinegar and water or mild detergents․ Always test a small area first to ensure the cleaner won’t harm the material․ For tougher stains, use a soft cloth and a non-abrasive scrubber to avoid scratching the surface․ This approach ensures your oven remains in excellent condition while maintaining safety and longevity․

9․3 Regular Maintenance Schedule

Establishing a regular cleaning schedule ensures your GE Monogram Oven remains efficient and looks its best․ Clean the exterior daily with a soft cloth to remove fingerprints and splatters․ Wipe the interior weekly, focusing on visible spills․ Run the self-clean cycle monthly to tackle tough buildup․ For deeper maintenance, clean the racks and check the door gasket every few months․ Always vent the area during self-cleaning to minimize odors and fumes․ Regular upkeep prevents grime accumulation and extends the oven’s lifespan․

Troubleshooting Common Issues

Addressing common issues like lingering odors or stubborn stains can be resolved with natural solutions like vinegar or baking soda․ Ensure proper ventilation and follow cleaning guidelines to maintain your oven’s performance and longevity․

10․1 Dealing with Odors

Odors in your GE Monogram Oven can be tackled effectively using natural solutions․ Mix water and white vinegar in a heat-safe bowl, place it inside, and heat at 350°F for 30 minutes․ This method neutralizes lingering smells․ For tougher odors, sprinkle baking soda on the oven floor and wipe clean after cooling․ Always ventilate the area thoroughly during and after cleaning to prevent fumes․ Regularly cleaning spills and avoiding harsh chemicals will help maintain a fresh, odor-free oven environment for optimal performance and safety․

10․2 Managing Stubborn Stains

For stubborn stains in your GE Monogram Oven, apply a baking soda and water paste directly to the affected areas․ Let it sit overnight, then wipe clean with a damp cloth․ For tough grease, use a gentle scrubber and a mixture of equal parts water and white vinegar․ Avoid harsh chemicals, as they can damage the oven’s finish․ Regularly addressing spills prevents stains from hardening, ensuring your oven remains in excellent condition for years to come․

Additional Tips and Best Practices

Preventative cleaning and eco-friendly solutions ensure your GE Monogram Oven stays pristine․ Use soft cloths and natural cleaners to avoid harsh chemicals․ Regular maintenance prevents grime buildup, extending longevity․

11․1 Preventative Measures

Preventative maintenance is key to keeping your GE Monogram Oven clean and functional․ Regularly wipe down surfaces after use to prevent grime buildup․ Use a gentle cleaner or steam to tackle spills immediately, avoiding harsh chemicals that can damage finishes․ Covering the oven floor with a liner or foil can catch debris and simplify cleaning․ Scheduling monthly deep cleans ensures your oven remains in top condition, preventing tough stains and odors from forming․ Consistency in these practices extends the oven’s lifespan and maintains its efficiency․

11․2 Using the Right Cleaning Tools

Using the right cleaning tools ensures effective and safe maintenance of your GE Monogram Oven․ Soft, lint-free cloths or sponges are ideal for wiping surfaces without scratching․ Gentle cleaning solutions, like baking soda and water or white vinegar, are recommended for manual cleaning․ For tougher stains, a soft-bristle brush or non-abrasive scrubber can be used․ Always avoid harsh chemicals, abrasive sponges, or metal scourers, as they may damage the oven’s finish․ Steam cleaning is also an excellent option for a chemical-free clean, leaving your oven pristine and hygienic․

11․3 Eco-Friendly Cleaning Options

Eco-friendly cleaning options are ideal for maintaining your GE Monogram Oven while reducing environmental impact․ Use a paste made from baking soda and water to tackle tough stains without harsh chemicals․ White vinegar dissolved in water is another effective, non-toxic solution for wiping down surfaces․ For a chemical-free deep clean, utilize the steam cleaning feature, which uses water vapor to loosen grime naturally․ These methods ensure a clean oven while promoting sustainability and avoiding harmful substances․

Warranty and Service Information

Your GE Monogram Oven is backed by a comprehensive warranty․ Regular cleaning and maintenance are essential to uphold warranty terms․ For service, contact GE’s dedicated support team or refer to your manual for specific instructions and warranty details․

12․1 Understanding Your Warranty

Your GE Monogram Oven warranty covers parts and labor for one year from purchase․ Proper maintenance, including regular cleaning, is required to maintain warranty validity․ Refer to your user manual for specific terms and conditions․ Contact GE customer support for any warranty-related inquiries or service needs․ Ensure all cleaning and maintenance activities align with manufacturer guidelines to avoid voiding the warranty․ Understanding your warranty ensures protection and longevity for your appliance․

12․2 When to Contact a Technician

Contact a qualified technician if your GE Monogram Oven experiences malfunctions, such as a faulty self-clean cycle or persistent odors․ If stubborn stains or damage occur despite proper cleaning, professional assistance is recommended․ Additionally, if the door gasket is damaged or the oven’s performance declines, seek expert help․ Avoid using harsh chemicals that could void the warranty․ Always follow manufacturer guidelines to ensure your oven operates safely and efficiently, and consult a technician for issues beyond routine cleaning and maintenance․

Regular cleaning and proper maintenance ensure your GE Monogram Oven performs optimally and lasts longer․ Follow these tips to keep it in excellent condition for years to come․

13․1 Key Takeaways

Regular cleaning is essential for maintaining your GE Monogram Oven’s performance and longevity․ Always prioritize safety, especially when using the self-clean feature․ Manual cleaning with gentle solutions and steam cleaning are effective methods․ Avoid harsh chemicals to protect the oven’s surfaces․ Clean racks separately and maintain the door gasket for a proper seal․ Schedule routine maintenance to prevent grease buildup and ensure optimal cooking results․ By following these tips, you can keep your oven in excellent condition for years to come․

13․2 Final Tips for Oven Longevity

Proper care ensures your GE Monogram Oven lasts for years․ Regularly wipe down surfaces after use to prevent grease buildup․ Use gentle cleaners to avoid damaging finishes․ Avoid extreme temperatures and ensure proper ventilation during operation․ Inspect and replace worn-out parts like door gaskets promptly․ Schedule professional maintenance if issues arise․ By following these practices, you’ll enjoy consistent performance and extend your oven’s lifespan․

reedy sc600-bl factory reset instructions

A factory reset restores the ESC to its original settings, useful for troubleshooting or starting fresh․ It erases custom configurations, so proceed with caution․

1․1 What is a Factory Reset?

A factory reset is a process that restores the Reedy SC600-BL ESC to its original, out-of-the-box settings․ This operation erases all custom configurations, such as throttle limits, brake settings, and timing profiles, reverting them to default values․ It is a useful troubleshooting step when dealing with persistent issues or when transferring ownership of the ESC․ Performing a factory reset ensures a clean slate, allowing users to reconfigure the device from scratch․ However, it does not affect hardware-related problems or damaged components․ Always back up custom settings before resetting, as they cannot be recovered afterward․ This process is a last-resort solution for resolving software-related issues․

1․2 Why Perform a Factory Reset?

A factory reset is essential for resolving persistent issues, such as software glitches or unexpected behavior, that cannot be fixed through normal troubleshooting․ It helps restore the ESC to its default settings, ensuring optimal performance and compatibility with other components․ Additionally, a factory reset is useful when transferring ownership or starting a new project, as it clears all customized settings․ This process can also address issues caused by faulty firmware or corrupted configurations․ However, remember that a factory reset will erase all custom settings, so it’s important to back up configurations before proceeding․ Always perform this reset with caution and only when necessary․

1․3 Items Required for the Reset

To perform a factory reset on the Reedy SC600-BL ESC, you will need a few essential items․ First, ensure you have the ESC itself, fully disconnected from your vehicle․ A power source, such as a battery, is required to power the ESC during the reset process․ You may also need a programming card or a compatible transmitter, depending on the method you choose․ Additionally, keep the user manual or digital instructions handy for reference․ Optional items include a computer with the Reedy firmware update software and a USB cable for connectivity․ Having these items prepared will ensure a smooth and successful reset process․

Understanding the Reedy SC600-BL ESC

The Reedy SC600-BL is a high-performance brushless electronic speed controller designed for RC vehicles, compatible with short-course trucks and similar applications, offering programmable features and reliable operation․

2․1 Overview of the Reedy SC600-BL

The Reedy SC600-BL is a high-performance brushless electronic speed controller (ESC) designed for RC short-course trucks and similar vehicles․ It offers smooth throttle response, adjustable settings, and reliable operation․ With its compact design and efficient cooling system, it ensures consistent performance in demanding conditions․ The ESC supports a wide range of brushless motors and is programmable to suit various driving styles․ Its robust construction and advanced features make it a popular choice among RC enthusiasts․ The SC600-BL is compatible with most RC radio systems and provides a user-friendly interface for tuning and customization, ensuring optimal performance for both casual and competitive use․

2․2 Key Features of the ESC

The Reedy SC600-BL ESC is a high-performance brushless electronic speed controller designed for RC vehicles․ It features a robust cooling system, multiple programmable modes, and compatibility with various motor types․ The ESC supports both NiMH and LiPo batteries, ensuring versatility for different power sources․ It also includes advanced thermal protection, overcurrent protection, and a compact, lightweight design for easy installation․ The SC600-BL is known for its smooth throttle response and efficient power delivery, making it ideal for both hobbyists and competitive racers․ Its user-friendly interface allows for easy configuration of settings, ensuring optimal performance tailored to specific driving needs․

2․3 Common Issues Solved by a Factory Reset

A factory reset can resolve issues like incorrect ESC settings, software glitches, or lost communication with the motor or radio․ It helps fix over-revving, poor throttle response, and unexpected shutdowns․ If the ESC has been configured improperly or exposed to corrupted firmware, resetting it restores default settings, ensuring proper operation․ Additionally, it addresses issues caused by failed firmware updates or incompatible configurations․ After the reset, the ESC should function as intended, but thorough testing is recommended to confirm․ Note that a factory reset does not fix hardware-related problems, which may require professional repair․

Preparing for the Factory Reset

Ensure the ESC is disconnected from the vehicle and powered off․ Gather tools, such as the user manual, and prepare for resetting to default settings․

3․1 Disconnecting the ESC from the Vehicle

Disconnecting the ESC from the vehicle is a critical step to ensure safety and prevent accidental power-up during the reset process․ Start by powering off the ESC completely․ Next, carefully detach the ESC from the vehicle’s chassis, ensuring all physical connections are removed․ Disconnect the motor and battery leads from the ESC terminals․ Verify that all wires are fully disconnected to avoid any residual power flow․ This step prevents unintended electrical responses and ensures the ESC is isolated for the factory reset․ Always refer to the vehicle’s manual for specific disconnection instructions if unsure․ Safety is paramount to avoid damage or electrical shock․

3․2 Ensuring the ESC is Powered Off

To safely perform a factory reset, ensure the Reedy SC600-BL ESC is completely powered off․ Disconnect the battery and any other power sources․ Verify the ESC’s LED indicators are not illuminated, confirming it has no active power․ Allow the ESC to remain idle for a few moments to discharge any residual power․ Failing to power off the ESC may result in unintended behavior or damage during the reset process․ Always prioritize this step to ensure a smooth and safe factory reset procedure․

3․3 Gathering Necessary Tools and Documents

To perform the factory reset, ensure you have a small screwdriver for accessing the ESC, the original programming card, and the user manual․ Keep notes or screenshots of your current settings for reference․ A laptop or tablet with the Reedy SC600-BL software may be needed for firmware updates․ Additionally, gather a multimeter for voltage checks and a clean, dry workspace․ Organize all tools and documents beforehand to avoid delays․ This preparation ensures a smooth and efficient reset process․ Having everything ready minimizes the risk of errors or incomplete steps during the procedure․

Step-by-Step Factory Reset Instructions

Access the reset option via the ESC menu, navigate to the reset prompt, confirm the action, and follow on-screen instructions to complete the process successfully․

4․1 Accessing the Reset Option

To access the reset option on your Reedy SC600-BL ESC, begin by powering on the device․ Once powered on, locate and press the “Set” button․ Hold this button down for a few seconds until the LCD screen displays the main menu․ Use the navigation buttons (typically marked as up and down arrows) to scroll through the options until you find the “Factory Reset” or “Restore Defaults” selection․ Highlight this option and press the “Set” button to confirm your choice․ The ESC will then prompt you to verify that you wish to proceed with the reset․ Confirming this will initiate the factory reset process, restoring the ESC to its original settings․

4․2 Navigating Through the Menu

Navigating through the menu is essential to access the factory reset option․ Use the ESC’s buttons or a program card to scroll through settings․ Start by powering on the ESC and entering the menu mode, typically done by pressing and holding the setup button․ Use the directional buttons to scroll to the “Factory Reset” option․ Highlight it and confirm your selection․ Some models may require additional steps, such as entering a passcode or selecting “OK” to proceed․ Ensure you carefully follow on-screen prompts to avoid unintended changes․ If using a program card, insert it and navigate to the reset option via the card’s interface․ Always confirm selections to proceed smoothly․

4․3 Executing the Reset Process

Once in the reset menu, select the “Factory Reset” option using the designated button․ Confirm the action when prompted, as this will erase all custom settings․ The ESC will initialize the reset process, restoring default settings․ The process is irreversible, so ensure all data is backed up; The ESC may reboot or show a completion indicator․ Avoid interrupting the process to prevent potential damage․ After completion, the ESC will restart with factory settings applied․ Verify the reset by checking default configurations․ If issues persist, consult the manual or contact support․ Ensure the process is followed carefully to avoid malfunctions․

4․4 Confirming the Reset

After executing the reset, confirm the process by checking for visual or audible cues, such as LED flashes or beeps, indicating the reset is complete․ Verify that all settings have reverted to factory defaults by reviewing the ESC’s menu․ Ensure no custom configurations remain․ If the reset was successful, the ESC will operate as it did out of the box․ If unsure, consult the user manual or repeat the process․ Once confirmed, proceed to reconfigure settings or update firmware if necessary․ A successful confirmation ensures the ESC is ready for proper operation․

4․5 Completing the Reset Process

After executing the reset, ensure the ESC confirms completion through LED signals or beeps․ Power cycle the ESC and reconnect it to your vehicle․ Reconfigure all settings as needed for optimal performance․

Post-Reset Configurations

After resetting, reconfigure settings like throttle, brake, and timing to suit your vehicle․ Ensure proper setup for optimal performance and reliability of the ESC․

5․1 Re-Configuring ESC Settings

After a factory reset, re-configuring the ESC settings is essential for optimal performance․ Start by resetting the throttle and brake endpoints to ensure proper calibration․ Adjust the timing and punch settings based on your vehicle’s specifications․ Re-enable or adjust features like drag brake, reverse, and voltage cutoff as needed․ Refer to the Reedy SC600-BL manual for default settings or use custom configurations tailored to your driving style․ Save each setting carefully to avoid losing changes․ Finally, test the ESC in a controlled environment to ensure everything functions as expected before full operation․

5․2 Updating Firmware (If Necessary)

After a factory reset, updating the firmware ensures the ESC operates with the latest features and bug fixes․ Visit the Reedy SC600-BL official website to download the newest firmware version․ Use the provided software or compatible tools to perform the update․ Carefully follow the instructions to avoid errors․ Never interrupt the update process, as it could damage the ESC․ Once complete, restart the ESC and verify proper functionality․ Updated firmware enhances performance, stability, and compatibility with other components․ Always use genuine Reedy software to prevent issues․

5․3 Testing the ESC After Reset

After completing the factory reset, reconnect the ESC to your vehicle and test its basic functions․ Ensure the motor responds correctly to throttle input and brakes smoothly; Check all modes, such as forward and reverse, to confirm they operate as expected․ Verify sensor detection and ensure acceleration is smooth without unexpected jerks․ Test the low-voltage cutoff and thermal protection to ensure they activate properly․ Use a multimeter to confirm proper voltage output if necessary․ Finally, run the ESC under a controlled load to ensure it remains cool and performs consistently․ This step ensures the reset was successful and the ESC is ready for reliable operation;

Troubleshooting Common Issues

Common issues during or after a factory reset may include error messages, connectivity problems, or settings not reverting․ Always refer to the user manual for guidance․

6․1 Issues During the Reset Process

During the factory reset, issues like error messages, unexpected shutdowns, or failed resets may occur․ Ensure the ESC is properly powered and connected․ If the reset fails, disconnect and reconnect the power source․ Verify that all buttons or inputs are functioning correctly․ If the issue persists, consult the user manual or Reedy support for assistance․ Avoid interrupting the reset process, as this could cause further complications․ Always follow the recommended steps carefully to minimize risks and ensure a successful reset․ If the ESC does not respond, check for loose connections or damaged components․ Contact Reedy support if the problem cannot be resolved independently․

6․2 Problems After the Reset

After resetting, issues like loss of custom settings, motor calibration problems, or connectivity issues may arise․ Ensure all connections are secure and recalibrate the ESC․ If problems persist, check for firmware updates or reinstall the latest version․ In rare cases, a second reset or contacting Reedy support may be necessary․ Always refer to the user manual for troubleshooting steps specific to your model․ Proper calibration and configuration are key to restoring optimal performance․

  • Loss of custom settings․
  • Motor or receiver connectivity issues․
  • Calibration problems requiring recalibration․
  • Firmware mismatches or outdated versions․

6․3 Contacting Reedy Support

If issues persist after a factory reset, contacting Reedy Support is recommended․ Visit their official website for contact details, such as email, phone, or support tickets․ Provide a detailed description of the problem, including any error messages or unusual behavior observed․ Include the ESC’s serial number and firmware version for faster assistance․ Reedy’s support team can offer advanced troubleshooting, repair options, or guidance on specific settings․ Be prepared to follow their instructions carefully to resolve the issue effectively․ Remember to check their support hours and response times to plan accordingly․ Professional help ensures your ESC operates at its best potential․

Resetting your Reedy SC600-BL ESC restores it to factory defaults, resolving issues and preparing it for a fresh setup․ Follow instructions carefully to ensure optimal performance․

7․1 Final Thoughts on Factory Reset

A factory reset is a valuable tool for resolving issues and restoring your Reedy SC600-BL ESC to its default state․ It provides a clean slate for reconfiguration, ensuring optimal performance․ Always perform the reset carefully, following the instructions to avoid unintended issues․ This process is particularly useful when troubleshooting or starting fresh with a new setup․ Remember to test the ESC thoroughly after the reset to ensure proper functionality․ By understanding and using the factory reset effectively, you can maintain your ESC’s performance and extend its lifespan․ Proper preparation and execution are key to a successful reset process․

7․2 Importance of Regular Maintenance

Regular maintenance is crucial for ensuring the Reedy SC600-BL ESC operates at peak performance․ Routine checks, such as cleaning connections and updating firmware, prevent issues before they arise․ By maintaining the ESC, you extend its lifespan, reduce the risk of unexpected failures, and ensure optimal functionality․ Consistent upkeep also helps preserve custom settings and prevents the need for frequent factory resets․ Proper care ensures reliability, especially in high-stress environments like racing or extreme driving conditions․ Always follow the manufacturer’s guidelines for maintenance to guarantee your ESC performs consistently and efficiently over time․ Regular maintenance is essential for both longevity and performance․

7;3 Additional Tips for Optimal Performance

  • Regularly update the ESC firmware to ensure the latest features and bug fixes are installed․
  • Keep the ESC clean and free from dust to maintain proper heat dissipation․
  • Always test the ESC after reconfiguration to confirm settings are correct․
  • Use a high-quality power source to avoid voltage fluctuations․
  • Monitor temperatures during operation to prevent overheating․
  • Store the ESC in a dry, cool place when not in use․
  • Consult the user manual for advanced tuning options․
  • Seek professional assistance if unfamiliar with complex settings․

medelert instructions

Welcome to your Medelert guide, designed to help you navigate the setup, operation, and troubleshooting of your personal emergency response system. With this guide, you’ll gain confidence in using Medelert to stay safe and connected during emergencies.

1.1 What is Medelert?

Medelert is a personal emergency response system designed to ensure user safety and quick assistance during critical situations. It consists of a wearable pendant with an emergency button and a base station that connects to a monitoring center. When activated, the system alerts emergency services or designated contacts, providing immediate support. Medelert is ideal for individuals who require assistance, such as the elderly or those with medical conditions, offering peace of mind and a reliable safety net.

1.2 Importance of Medelert in Emergency Situations

Medelert is crucial for ensuring immediate assistance during emergencies, providing users with a quick and reliable way to call for help. Its round-the-clock monitoring service guarantees that assistance is just a button press away, offering peace of mind for both users and their families. Medelert is especially vital for elderly individuals or those with health conditions who may need urgent aid. It helps prevent situations from escalating by enabling rapid response, ensuring safety and well-being during critical moments.

Understanding the Medelert System

This section explains the Medelert System, including its components and how it operates to provide emergency assistance. Understanding its functionality ensures effective use in critical situations.

2.1 Key Components of the Medelert Device

The Medelert Device consists of a compact, wearable pendant with an emergency button, a base station, and a speaker. The pendant is lightweight and water-resistant, designed for daily wear. The base station connects to your phone line or cellular network, enabling communication with emergency services. A built-in speaker and microphone allow two-way conversation. LED indicators provide status updates, such as battery life or connectivity. A rechargeable battery ensures reliability, while the device’s portability makes it suitable for use at home or on the go.

2.2 How Medelert Connects to Emergency Services

When the emergency button is pressed, Medelert’s base station sends a signal to a monitoring center through your phone line or cellular network. Trained professionals assess the situation and dispatch emergency services if needed. The device enables two-way communication, allowing you to speak with responders. It also shares your location for faster assistance. This seamless connection ensures help is just a button press away, providing peace of mind for users and their families. The process is designed for speed and reliability in critical moments.

Setting Up Your Medelert Device

Setting up your Medelert device is simple and straightforward. Follow the step-by-step guide to ensure proper installation, connection, and activation. This section covers everything you need to get started.

3.1 Unboxing and Initial Setup

Carefully unbox your Medelert device and ensure all components are included, such as the pendant, base unit, charging cable, and user manual. Begin by placing the base unit in a central location, ideally near a power source, and plug it in. Next, charge the pendant using the provided cable or docking station. Once charged, familiarize yourself with the device by reading the manual. This step ensures you’re prepared to activate and use your Medelert effectively.

3.2 Charging the Medelert Device

To charge your Medelert device, locate the USB charging port on the base unit or pendant. Use the provided cable to connect it to a power source. The LED indicator will turn red while charging and green when fully charged. Ensure the device is charged for at least 24 hours initially. Regular charging is essential, especially if you notice low battery warnings. Store the charging cable in an accessible place to maintain your device’s readiness for emergencies. Always keep the device charged to guarantee reliability.

3.3 Activating the Medelert Service

To activate your Medelert service, visit the activation website provided in your user manual. Enter the activation code found in your packaging or manual. Follow the online prompts to create your user profile, including personal and medical information. Designate an emergency contact and review your response plan. Once completed, your device will be linked to the emergency monitoring center. Activation is crucial for the device to function correctly during emergencies. If you encounter issues, contact Medelert customer support for assistance. Ensure activation is completed promptly to maintain your safety.

Operating the Medelert Device

Press the emergency button to connect with the monitoring center. Speak clearly into the device for two-way communication. Regularly test the button to ensure functionality. Check LED indicators for status updates. Always wear the pendant for quick access. If the battery is low, recharge promptly to maintain reliability. Proper operation ensures your safety and peace of mind during emergencies.

4.1 Wearing the Medelert Pendant

Wear the Medelert pendant around your neck using the provided lanyard for easy access. Ensure the button faces outward and is within reach. Adjust the lanyard length for comfort. Keep the pendant visible to avoid obstruction. Regularly inspect the lanyard for wear and tear. Test the button periodically to confirm functionality. Always wear the pendant, especially at night or when alone, to ensure immediate assistance in emergencies. Proper wear ensures your safety and peace of mind.

4.2 Testing the Emergency Button

Regularly test the emergency button to ensure it functions correctly. Press and hold the button for 3 seconds to activate a test call. Confirm the LED indicator lights up, signaling the device is working. After activation, you’ll receive a confirmation call from the monitoring center. Test the button monthly and after any software updates to maintain reliability. Always ensure the device is fully charged before testing. Proper testing habits help guarantee your safety during real emergencies.

4.3 Understanding LED Indicators

The Medelert device uses LED indicators to provide visual feedback. A steady green light indicates a stable connection to the monitoring center, while a flashing red light signals a system error. A yellow light appears during charging, turning green when fully charged. A blue light flashes during an active emergency call. Familiarize yourself with these indicators to monitor the device’s status effectively. Always refer to the user manual for a detailed explanation of all LED patterns and their meanings. Regular checks ensure optimal performance.

Advanced Features of Medelert

Medelert’s advanced features include customizable emergency response plans and smartphone app integration, ensuring a personalized and efficient system tailored to individual needs for enhanced safety.

5.1 Customizable Emergency Response Plans

Medelert allows users to create tailored emergency plans, ensuring quick and appropriate responses. Customize contact lists, emergency protocols, and response sequences to suit individual needs. This feature enhances safety by enabling personalized alerts and notifications, ensuring help reaches you faster. With customizable plans, users can adapt the system to specific scenarios, such as medical emergencies or home invasions, providing peace of mind and efficient assistance when needed most.

5.2 Integration with Smartphone Apps

Medelert seamlessly integrates with its companion smartphone app, enhancing your emergency response experience. The app allows users to monitor device status, receive notifications, and access emergency contacts. It also enables location sharing, ensuring responders can find you quickly. Customize alerts and notifications directly from the app, and stay connected to loved ones during critical moments. This integration ensures a comprehensive safety net, combining the convenience of wearable technology with the power of mobile connectivity for enhanced peace of mind.

Safety Tips for Using Medelert

Ensure your Medelert device is always functioning properly by performing regular checks, maintaining proper battery life, and keeping it easily accessible for emergencies.

6.1 Regular Maintenance Checks

Regular maintenance ensures your Medelert device operates reliably. Check the battery status weekly, inspect for physical damage, and clean the pendant to prevent dirt buildup. Test the emergency button monthly to confirm it triggers alerts. Verify connectivity to emergency services and review your response plan. Schedule these checks to maintain peak performance and ensure your safety. Consistent upkeep guarantees your Medelert is ready to assist during critical moments, providing peace of mind for you and your loved ones.

6.2 Ensuring Proper Battery Life

To maintain optimal performance, regularly monitor your Medelert device’s battery. Charge it using the provided cable, and avoid letting it drain completely. Store the device in a cool, dry place when not in use. Replace the battery as recommended by the manufacturer or when you notice reduced performance. Always check battery levels during routine maintenance to ensure reliability. A well-maintained battery guarantees your Medelert remains operational during emergencies, providing consistent protection and peace of mind.

6.3 Keeping the Device Accessible

Always keep your Medelert device within easy reach to ensure quick access during emergencies. Wear the pendant consistently, especially at night or when alone. Place the base unit in a visible, central location, such as a living room or bedroom. Avoid hiding it in closets or drawers, as this could delay response times. Regularly check that the device is accessible and not obstructed by furniture or other items. Accessibility is key to leveraging Medelert’s emergency capabilities effectively.

Troubleshooting Common Issues

Troubleshooting your Medelert device involves identifying and addressing common problems like connectivity loss or battery drain. Follow specific steps to resolve these issues promptly and effectively.

7.1 Resolving Connectivity Problems

If your Medelert device loses connection, start by checking signal strength in your area. Ensure no physical obstructions are blocking the signal. Restart the device and base station if applicable. Verify that all cables are securely connected. If issues persist, sync the device with the base station again. Check for any firmware updates and install them. Finally, contact customer support if the problem remains unresolved after these steps. Always ensure your device is properly registered and subscribed to the service.

7.2 Fixing a Non-Responsive Button

If the emergency button isn’t responding, first clean it gently with a soft cloth to remove dirt or debris. Press the button firmly to ensure proper contact. If unresponsive, check the battery level and charge the device. Ensure the charging port is clean and free of obstructions. Restart the device to reset its system. If the issue persists, contact Medelert customer support for assistance or potential replacement. Regular maintenance can help prevent such issues.

Additional Resources

For further assistance, visit the official Medelert website for user manuals, troubleshooting guides, and detailed setup instructions. Contact customer support for personalized help or questions.

8.1 User Manuals and Guides

The official Medelert website offers comprehensive user manuals and guides to help you understand and utilize your device effectively. These resources cover setup, operation, and troubleshooting, ensuring you can resolve issues independently. Detailed step-by-step instructions are provided for both basic and advanced features. Additionally, video tutorials and downloadable PDF guides are available for easy access. Visit the Medelert support page to explore these resources and enhance your experience with the system.

8.2 Customer Support Contact Information

For any questions or assistance with your Medelert device, contact our dedicated customer support team. You can reach us via phone at 1-800-MEDELERT or email at support@medelert.com. Our live chat service is also available on the Medelert website for immediate help. Additionally, visit the support portal at support.medelert.com for FAQs, troubleshooting guides, and to submit a ticket. Our team is available 24/7 to ensure your safety and satisfaction with the Medelert system.

Medelert empowers users with reliable, life-saving technology, ensuring peace of mind and swift emergency response. Follow the guide to maximize its benefits and stay protected always.

9.1 Summary of Key Points

Medelert is a user-friendly emergency response system designed for safety and reliability. By following the setup, operation, and maintenance guidelines, users can ensure optimal performance. Key features like the emergency button, LED indicators, and customizable response plans enhance functionality. Regular checks, proper battery care, and troubleshooting tips help maintain efficiency. With Medelert, users gain peace of mind, knowing help is just a button press away. This guide provides a comprehensive roadmap to maximize Medelert’s benefits and ensure user safety;

9.2 Final Thoughts on Medelert Usage

Medelert is a reliable and essential tool for personal safety, offering peace of mind for users and their loved ones. Its ease of use, combined with advanced features, makes it a vital companion for emergencies. By following the guidelines outlined in this guide, users can ensure their Medelert system functions optimally. Remember to perform regular checks and maintain proper battery life to maximize its reliability. With Medelert, you can feel confident in your ability to stay safe and connected during critical moments.

Frequently Asked Questions (FAQs)

Q: What is the primary purpose of Medelert?

Medelert is designed to provide instant access to emergency assistance, ensuring user safety and peace of mind in critical situations.

Q: How does Medelert connect to emergency services?

Medelert uses cellular or landline connections to link users directly to emergency responders, enabling rapid assistance during emergencies.

Q: What should I do if my Medelert device stops working?

Contact customer support immediately for troubleshooting or replacement to ensure uninterrupted protection and service.